4.5.4 Setting the Junk Mailbox in Apple Mail
SpamSieve’s Mail extension always moves incoming spam messages to the Junk mailbox, and if you’re using the Mail plug-in instead, we strongly recommend configuring things that way, too. If desired, you can set a separate location where SpamSieve should move a message when you manually train it as spam. The Junk mailbox is displayed with a special icon in Mail:
![]()
Each account in Mail has its own Junk mailbox, and SpamSieve will move spam messages to the Junk mailbox of the account that received them.
Choose a Server Mailbox in “Mailbox Behaviors”
The Junk mailbox is not fixed; rather, Mail has a setting where you can designate which mailbox should be treated as the special Junk mailbox. We recommend that for each account you choose a mailbox that’s stored on the mail server and that you choose the same one that’s used by the server’s junk filter (if any). Mail normally does this automatically, but you can check its settings to be sure that it is set up to do this.
To choose the Junk mailbox, go to Settings ‣ Accounts ‣ Mailbox Behaviors in Mail. (With older versions, this is called Special Mailboxes.)
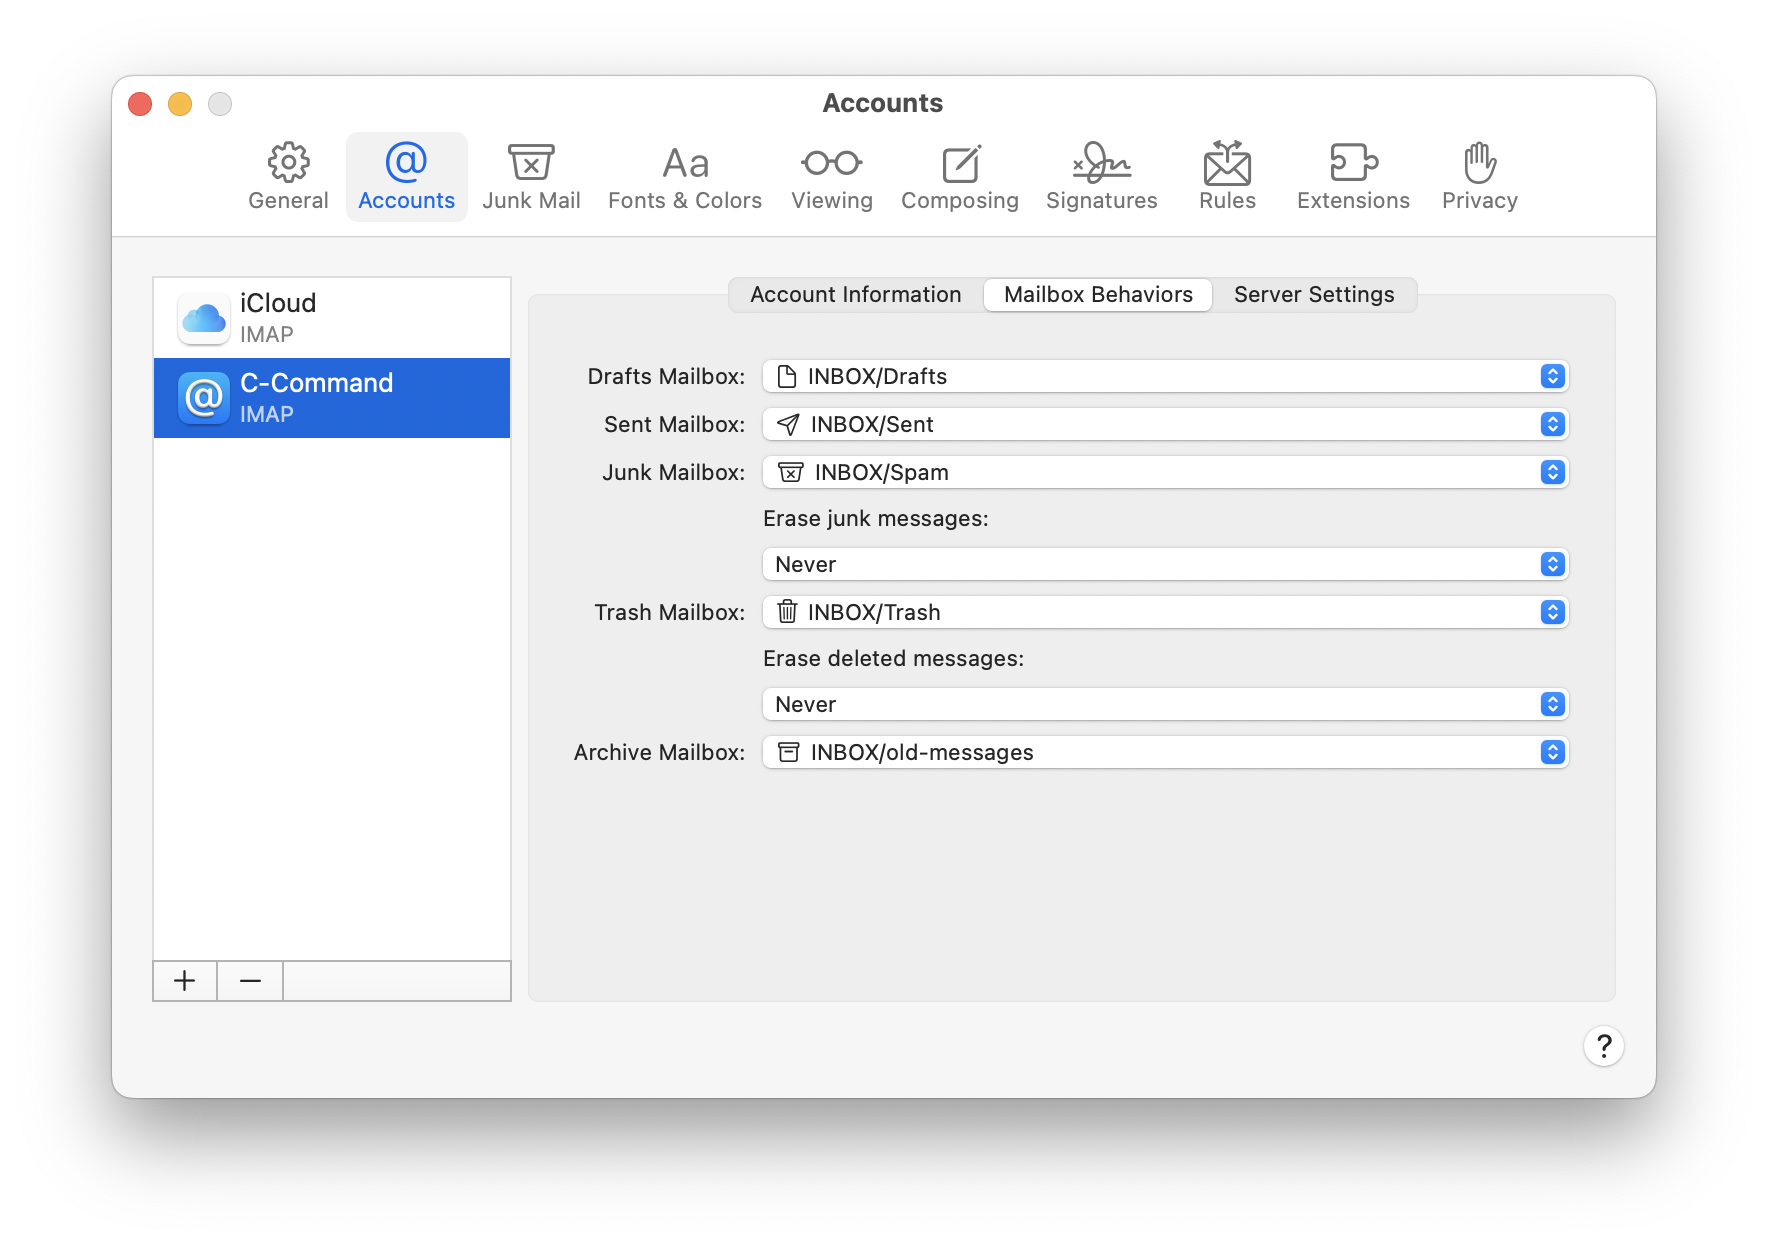
For each IMAP or Gmail account, next to Junk Mailbox, choose the junk or spam mailbox that’s inside your account (not the one under On My Mac). If there are multiple such mailboxes, choose the one that your server junk filter is moving spam messages to. For a Gmail account, this is [Gmail]/Spam. For a Yahoo account, this is Bulk. If you don’t see that, you may need to go to the Gmail settings and set the Spam mailbox to be shown in IMAP.
For each Exchange account, make sure that Store junk messages on the server is checked.

For each POP account, make sure that Mail’s sidebar shows a Junk mailbox (with the special icon) under the account. If there is no such mailbox, you can create one by selecting a spam message in the account’s inbox and choosing Message ‣ Move to Junk. (This is the only time when you should use that menu command when using SpamSieve. It is the only way to assign the Junk mailbox for a POP account, without which SpamSieve will not be able to move messages for that account to Junk.)

For example, the Gmail server junk filter will move the messages it catches to a mailbox called Spam (as shown when you log into Webmail or using IMAP). You should tell Mail to use this mailbox. Then, the Spam mailbox will disappear from the mailbox list in Mail, the spam messages will be displayed in the special Junk mailbox, and both Gmail and SpamSieve will move spam messages there.
The same list of spam messages will also be available on other devices and via Webmail, though the displayed name of the Junk mailbox may be different in different places.
All Junk
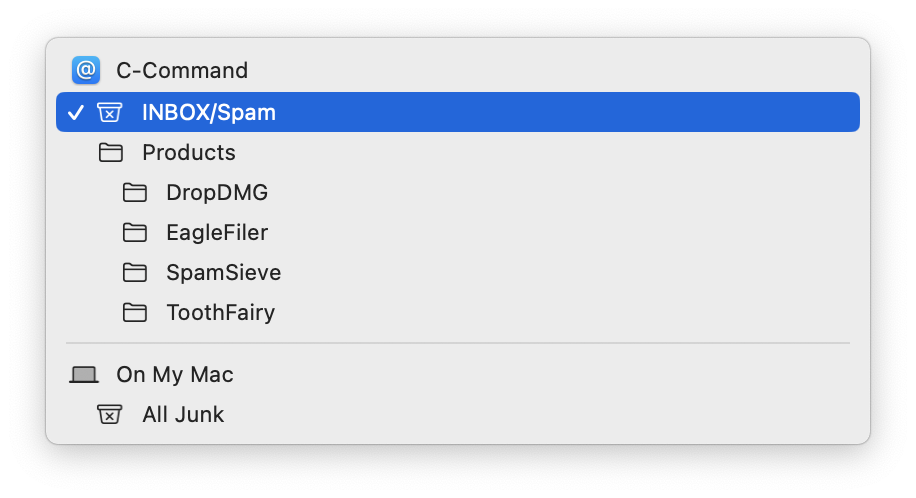
Although spam messages are stored in per-account Junk mailboxes, you may wish to view all the spam messages together in one place. This special “merged” Junk mailbox was automatic in previous versions of Mail and can be configured as option with macOS 11 and later. Click the + button when you hover over Favorites at the top of Mail’s mailbox list:
![]()
You can then add the special All Junk mailbox to the list:
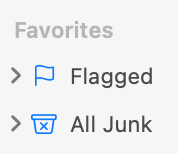
If necessary, you can still click the > next to All Junk to see the separate Junk mailbox for each account.
Separate Mailboxes for Each Spam Filter
Most users like All Junk because it offers a single, consolidated view of all the spam messages caught by SpamSieve and the server filters for all of your accounts. However, it is possible to use separate mailboxes for SpamSieve and the server filter. In most cases, you cannot change which mailbox the server filter uses. However, you can create a new SpamSieveSpam mailbox in Mail (with the Location set to within your IMAP account). Then select this mailbox as the Junk Mailbox in the Mailbox Behaviors settings. SpamSieveSpam will now appear as Junk in Mail and be used by SpamSieve. The server filter’s mailbox will reappear in Mail under a different name such as Spam, Junk (without the special icon), or Bulk Mail.
What If I Was Using the Spam Mailbox Before?
With earlier versions of SpamSieve, we recommended configuring Apple Mail to move the spam messages caught by SpamSieve to a Spam mailbox under On My Mac. With changes to how mail servers and Apple Mail work, we now strongly recommend using the Junk mailbox, as described above. This is automatic with the Mail extension setup. If you’re using the Mail plug-in, you can find the SpamSieve rule in Mail’s settings and update the pop-up menu at the bottom so that it moves the messages to All Junk. You can also go to the Settings ‣ Apple Mail ‣ Training window and set it to move trained spam messages to the Junk mailbox.