3.8.3 Outlook POP Account Rules
When Setting Up Outlook (Large Inboxes), repeat these instructions for each POP account that you have.
Create a new folder called InboxSpamSieve. You can do this by Control-clicking on On My Computer in Outlook’s main window and choosing New Folder. (You only need one folder for all your POP accounts.)
Go to Outlook’s Tools menu and choose Rules to open the Rules list.

Click on POP under Client Rules.
Uncheck or delete any (non-SpamSieve) rules for filtering out junk/spam e-mails.
Click the + button at the bottom of the window to create a new rule.
Change the name of the rule to InboxSpamSieve (AccountName) where AccountName is the name of your account (e.g. POPAccount in this example).
Under When a new message arrives, choose Account, Is, and AccountName (iCloud in this example):
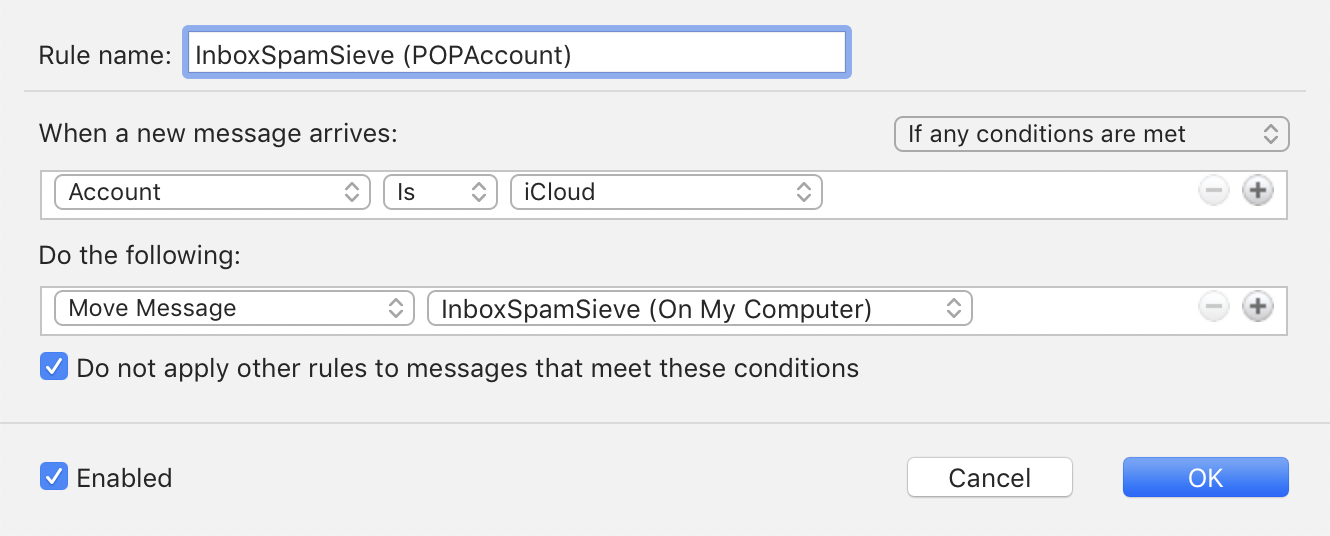
Under Do the following, choose Move Message and InboxSpamSieve (On My Computer). If InboxSpamSieve (On My Computer) is not in the second pop-up menu, you can choose Choose Folder… from the pop-up menu and then search for it.
Click OK to save the rule. You can now repeat this section for any additional POP accounts, or return to Setting Up Outlook at Step 5.