2.6.1 Granting Full Disk Access
As discussed in the Security & Privacy Access section, EagleFiler needs Full Disk Access in order to fully function.
To Grant Full Disk Access on macOS 13 Ventura Through macOS Tahoe 26
Go to System Settings ‣ Privacy & Security ‣ Full Disk Access. (You can also click here to go directly to Full Disk Access.)
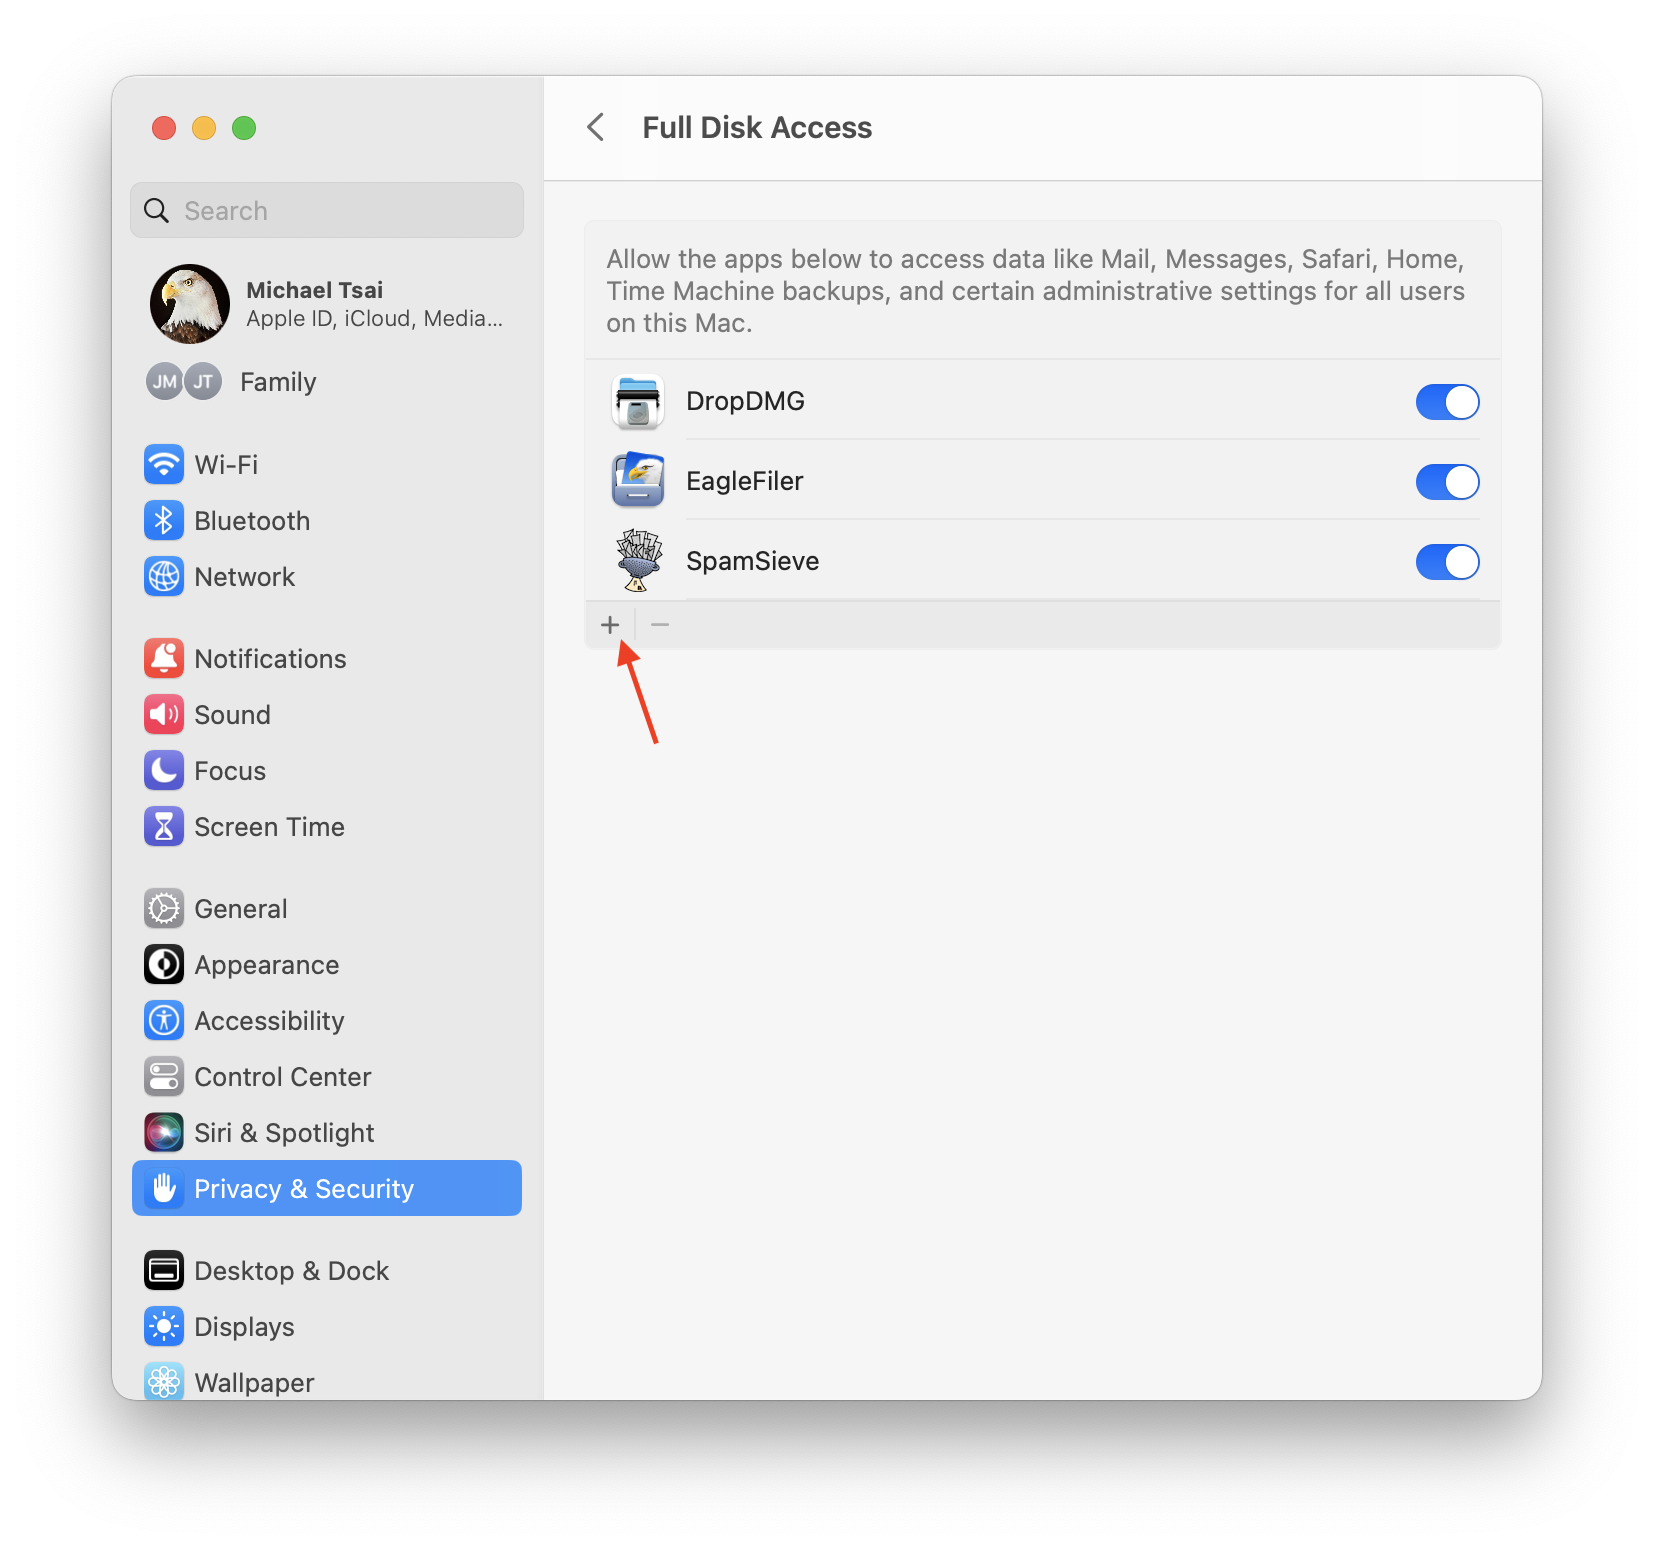
Click the + button indicated by the red arrow and choose EagleFiler from your Applications folder. Click Quit & Reopen if applicable. EagleFiler should now appear in the list as checked.
Double-click the EagleFiler icon to relaunch it if it is not already open.
To Grant Full Disk Access on macOS 10.14 Through macOS 12
Go to the Security & Privacy pane of System Preferences and click on the Privacy tab. Then scroll down and click on Full Disk Access. (You can also click here to go directly to Full Disk Access.)
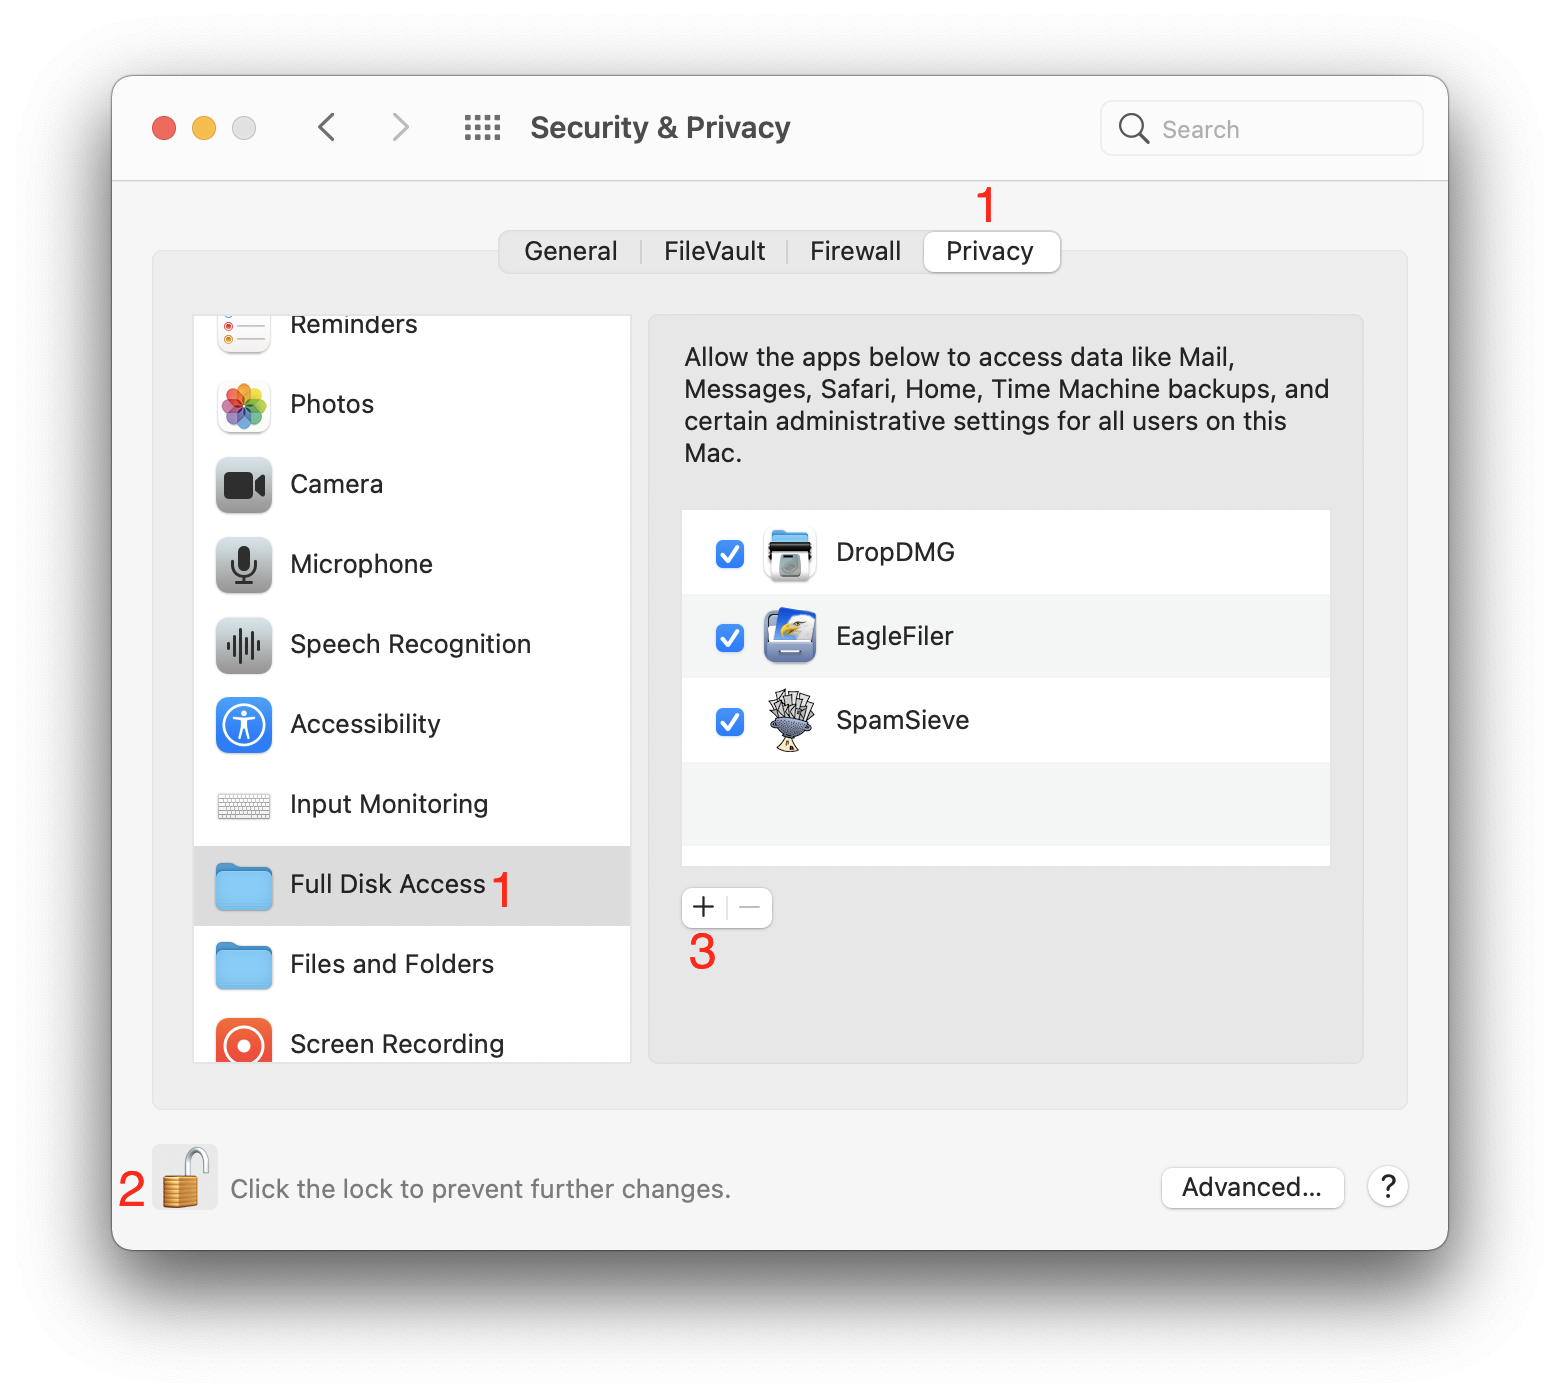
If the lock button in the lower left corner of the window is locked, click on it, enter your Mac’s login password, and click Unlock so that you are allowed to make changes.
Click the + button and choose EagleFiler from your Applications folder. Click Quit Now if applicable. EagleFiler should now appear in the list as checked.
Double-click the EagleFiler icon to relaunch it.
Troubleshooting Full Disk Access
In rare cases, EagleFiler may not appear in the Full Disk Access list after you add it. First, try restarting your Mac. You can also enter this command in Terminal:
tccutil reset SystemPolicyAllFiles
to reset the system’s database of Full Disk Access privileges and then try adding EagleFiler again.
If you still aren’t able to add EagleFiler, see the Troubleshooting Privacy Access section.