2.6.1 Granting Full Disk Access
As discussed in the Security & Privacy Access section, EagleFiler needs additional file access in order to fully function. On macOS 27.3 and later, you can grant Files & Folders access only for the folder that EagleFiler actually needs. Earlier versions of macOS don’t support that, so you need to grant Full Disk Access (as described later in this section).
To Grant Files & Folders Access on macOS 27.3 and Later
Click here to open the Files & Folders settings or go to System Settings ‣ Privacy & Security ‣ Files & Folders.
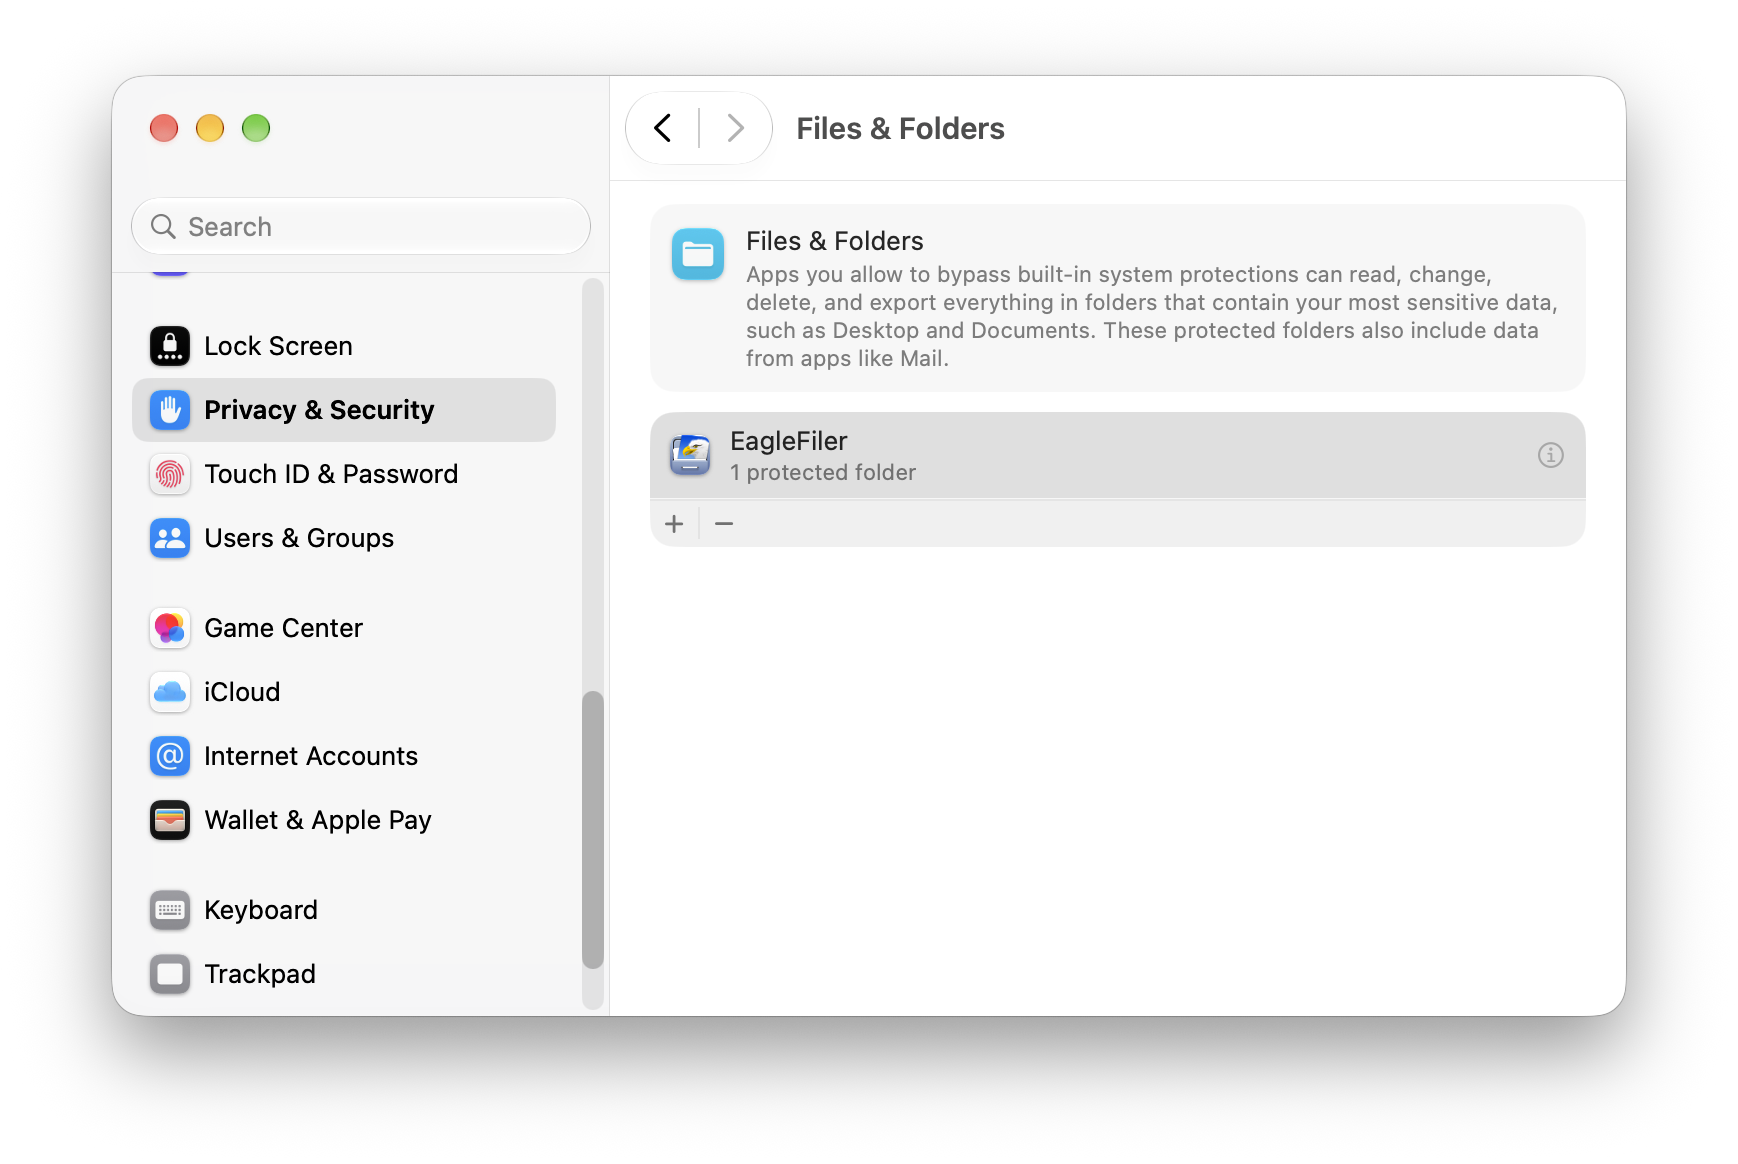
Scroll down, if necessary, to find EagleFiler in the list and click the (i) button next to it. If you don’t see EagleFiler in the list, you can add it by clicking the + button and choosing EagleFiler from your Applications folder. macOS will show this sheet:
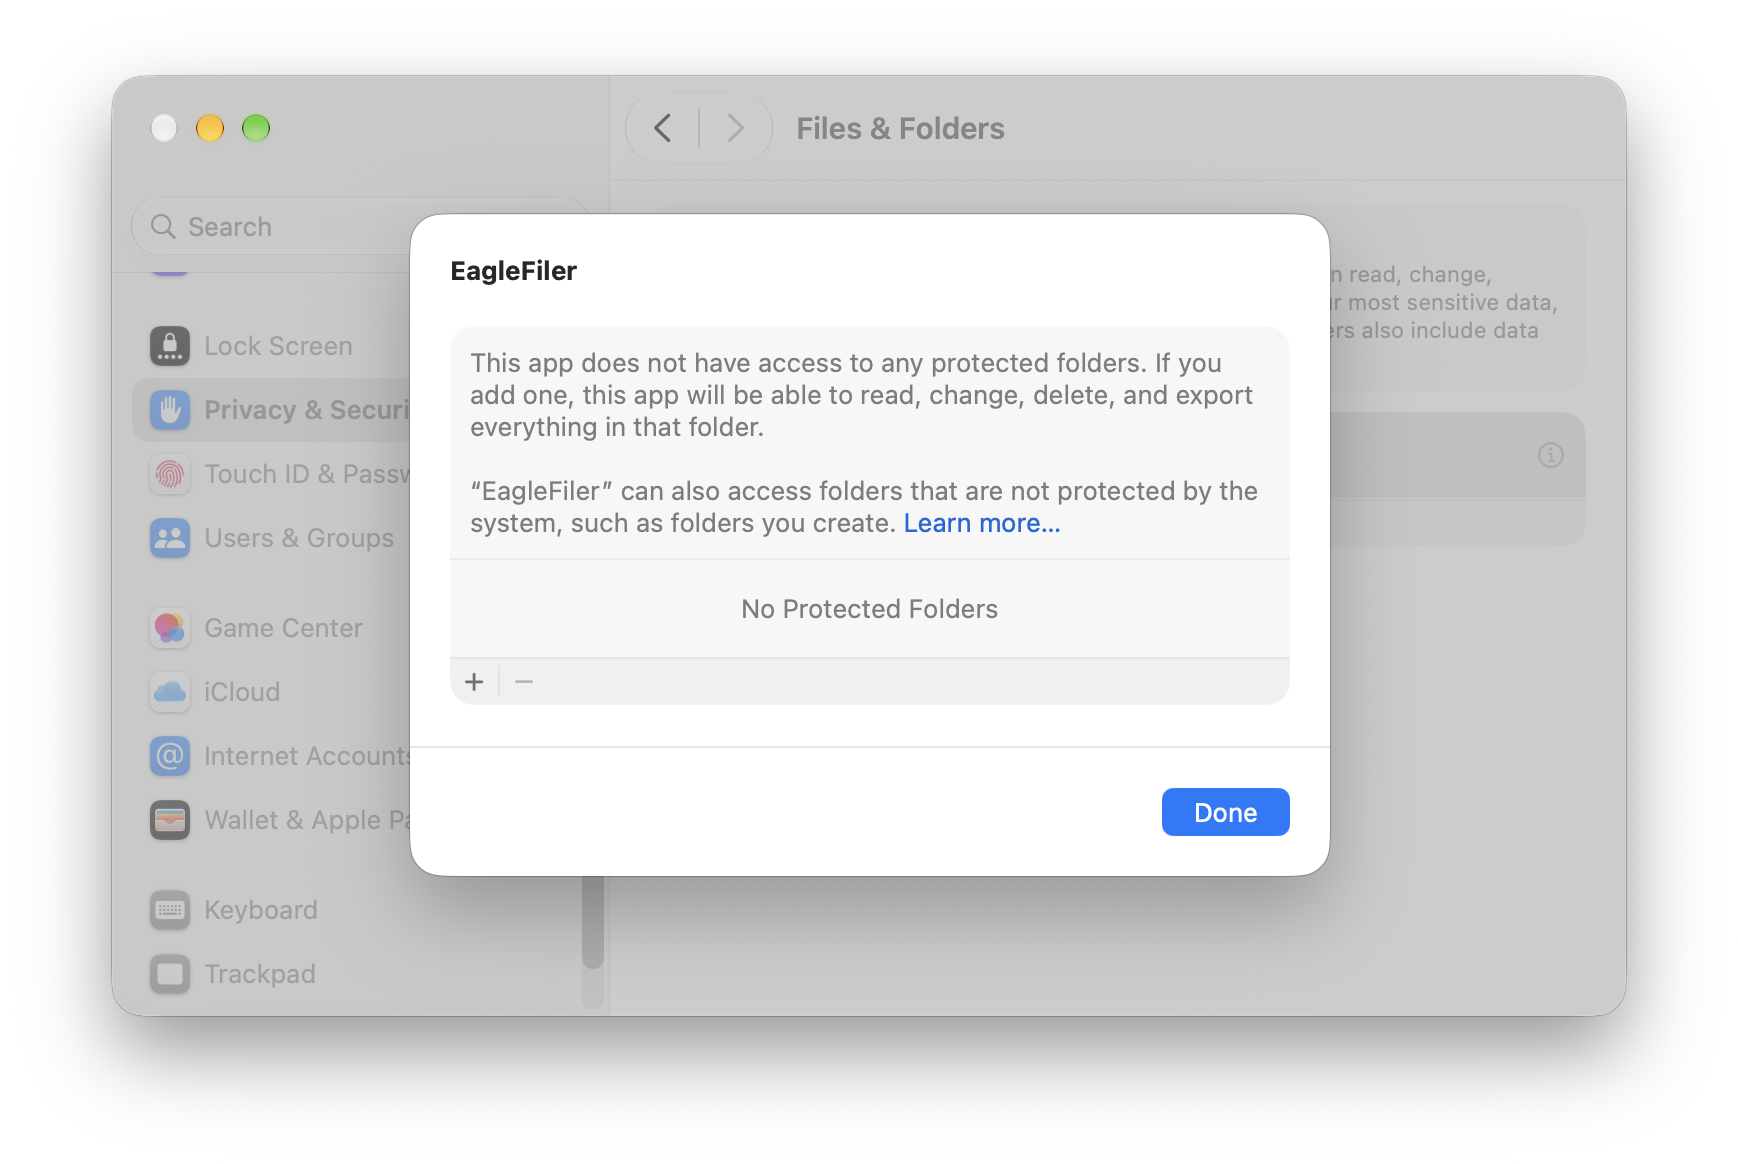
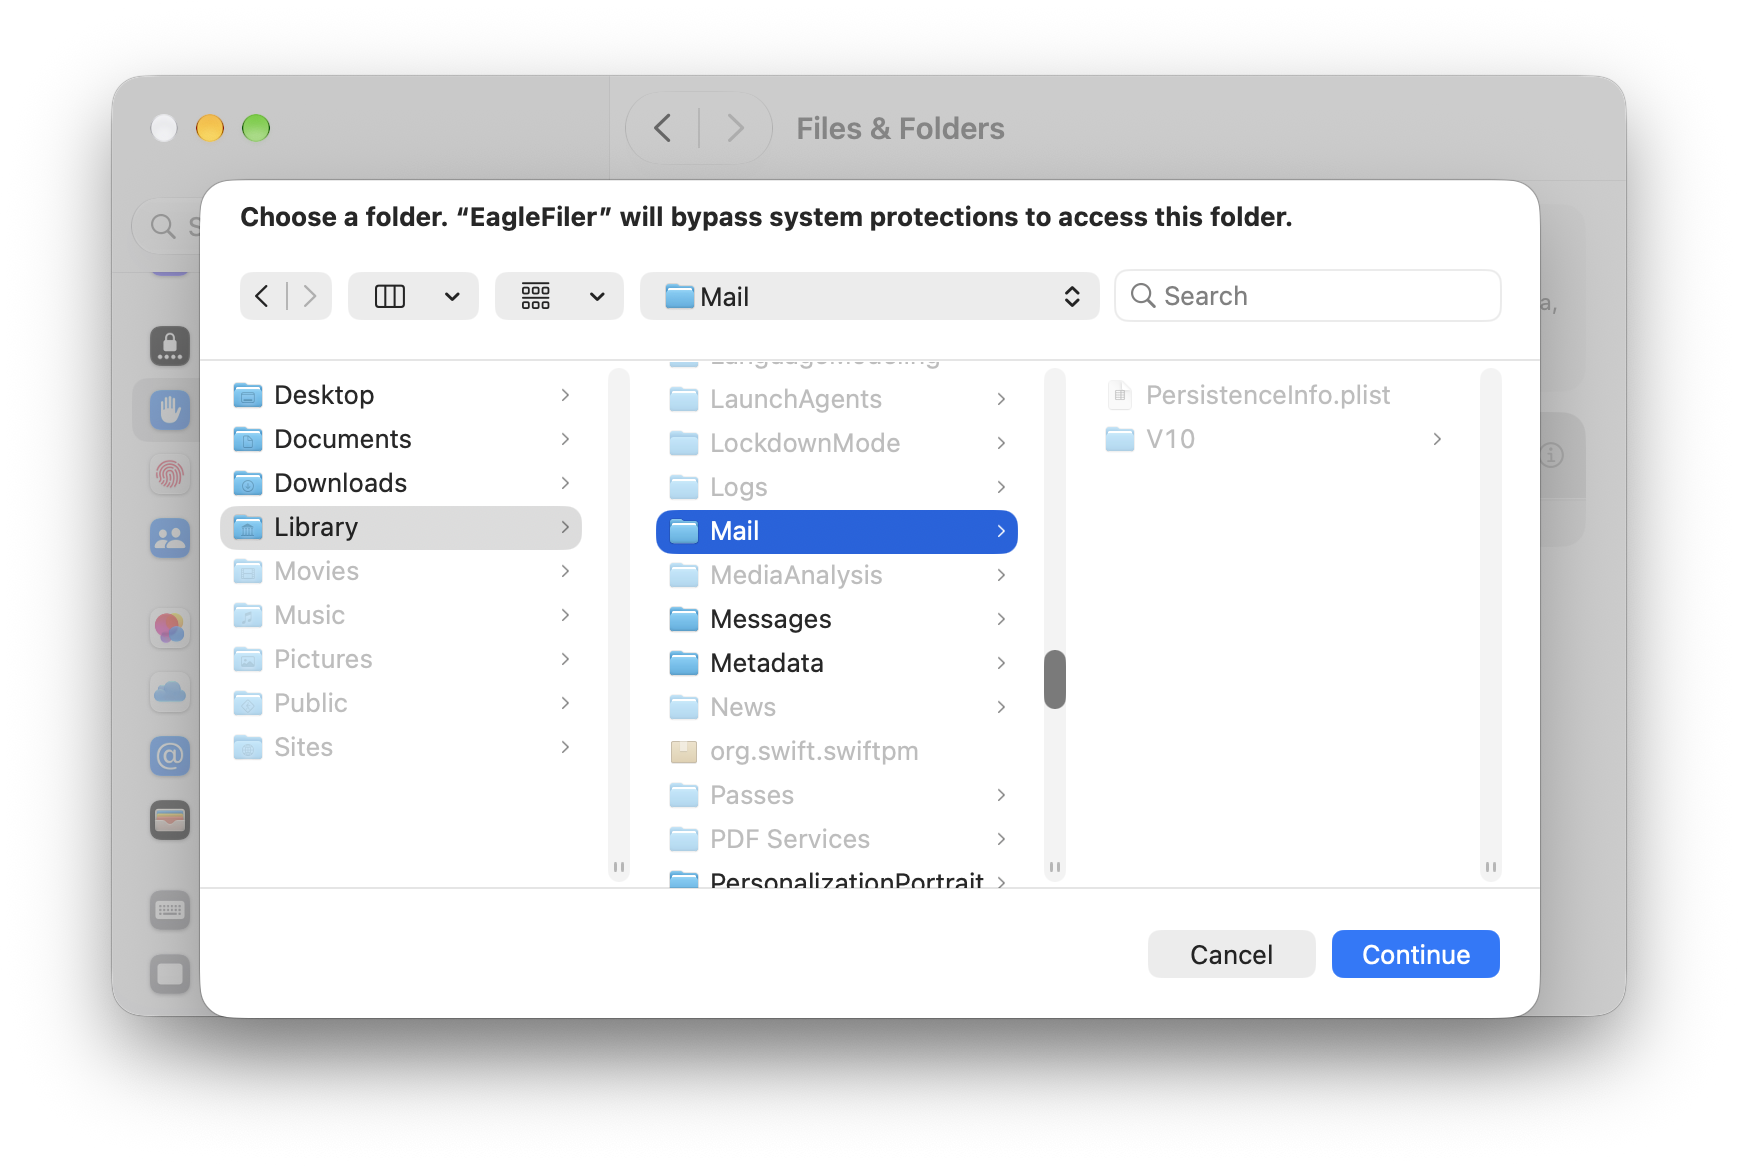
Click the + button to add a protected folder. This will open a window showing the contents of your Library folder. Select the Mail folder inside of Library and click Continue.
macOS will ask if you want to allow EagleFiler to bypass system protections for that folder. Click Allow. Enter your Mac’s login password to confirm and click OK.
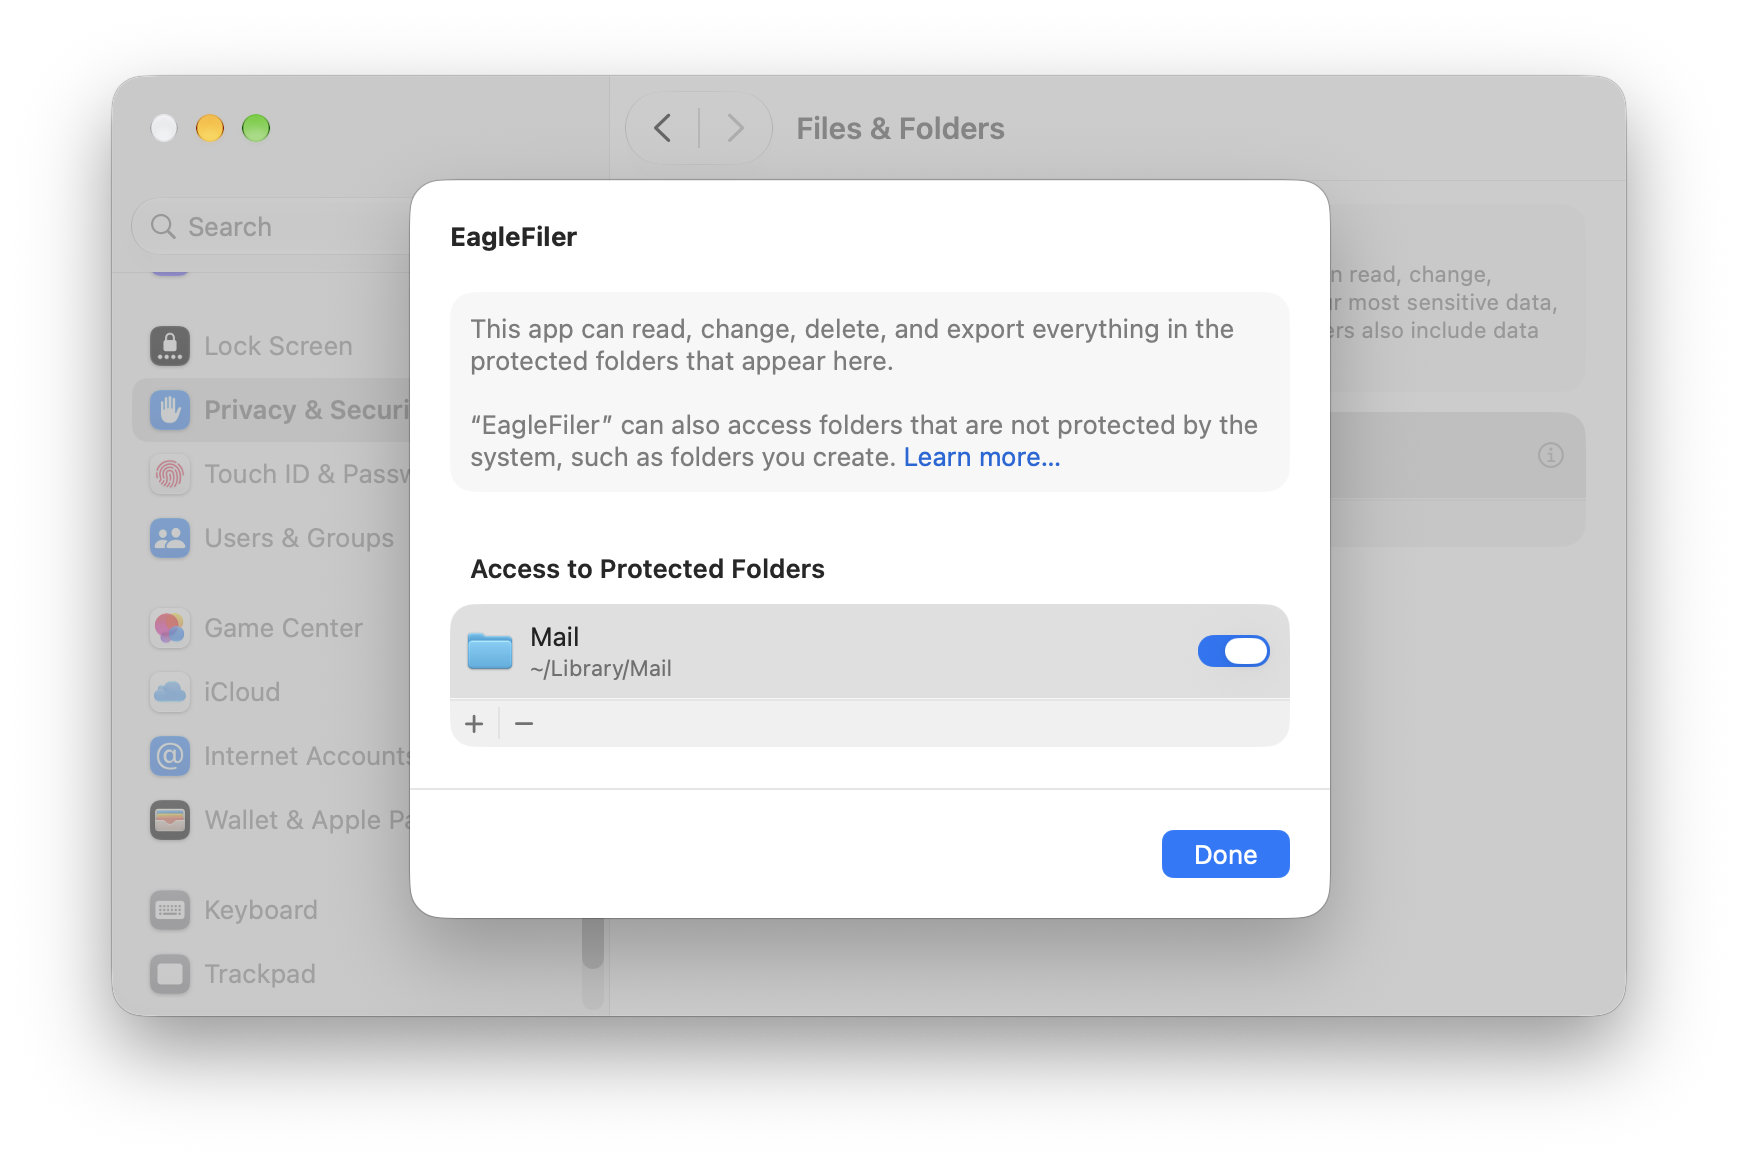
The window should now look like this and you can click Done.
Troubleshooting Files & Folders Access
If you have trouble following the instructions above, you may find it easier to grant Full Disk Access as described below.
In rare cases, EagleFiler or the desired folder may not appear in the Files & Folders list after you add it. First, try restarting your Mac. You can also enter this command in Terminal:
tccutil reset All
to reset the system’s database of privileges and then try adding EagleFiler again.
If you still aren’t able to add EagleFiler, see the Troubleshooting Privacy Access section.
To Grant Full Disk Access on macOS 13 Through macOS 27.2
Click here to open the Full Disk Access settings or go to System Settings ‣ Privacy & Security ‣ Full Disk Access.
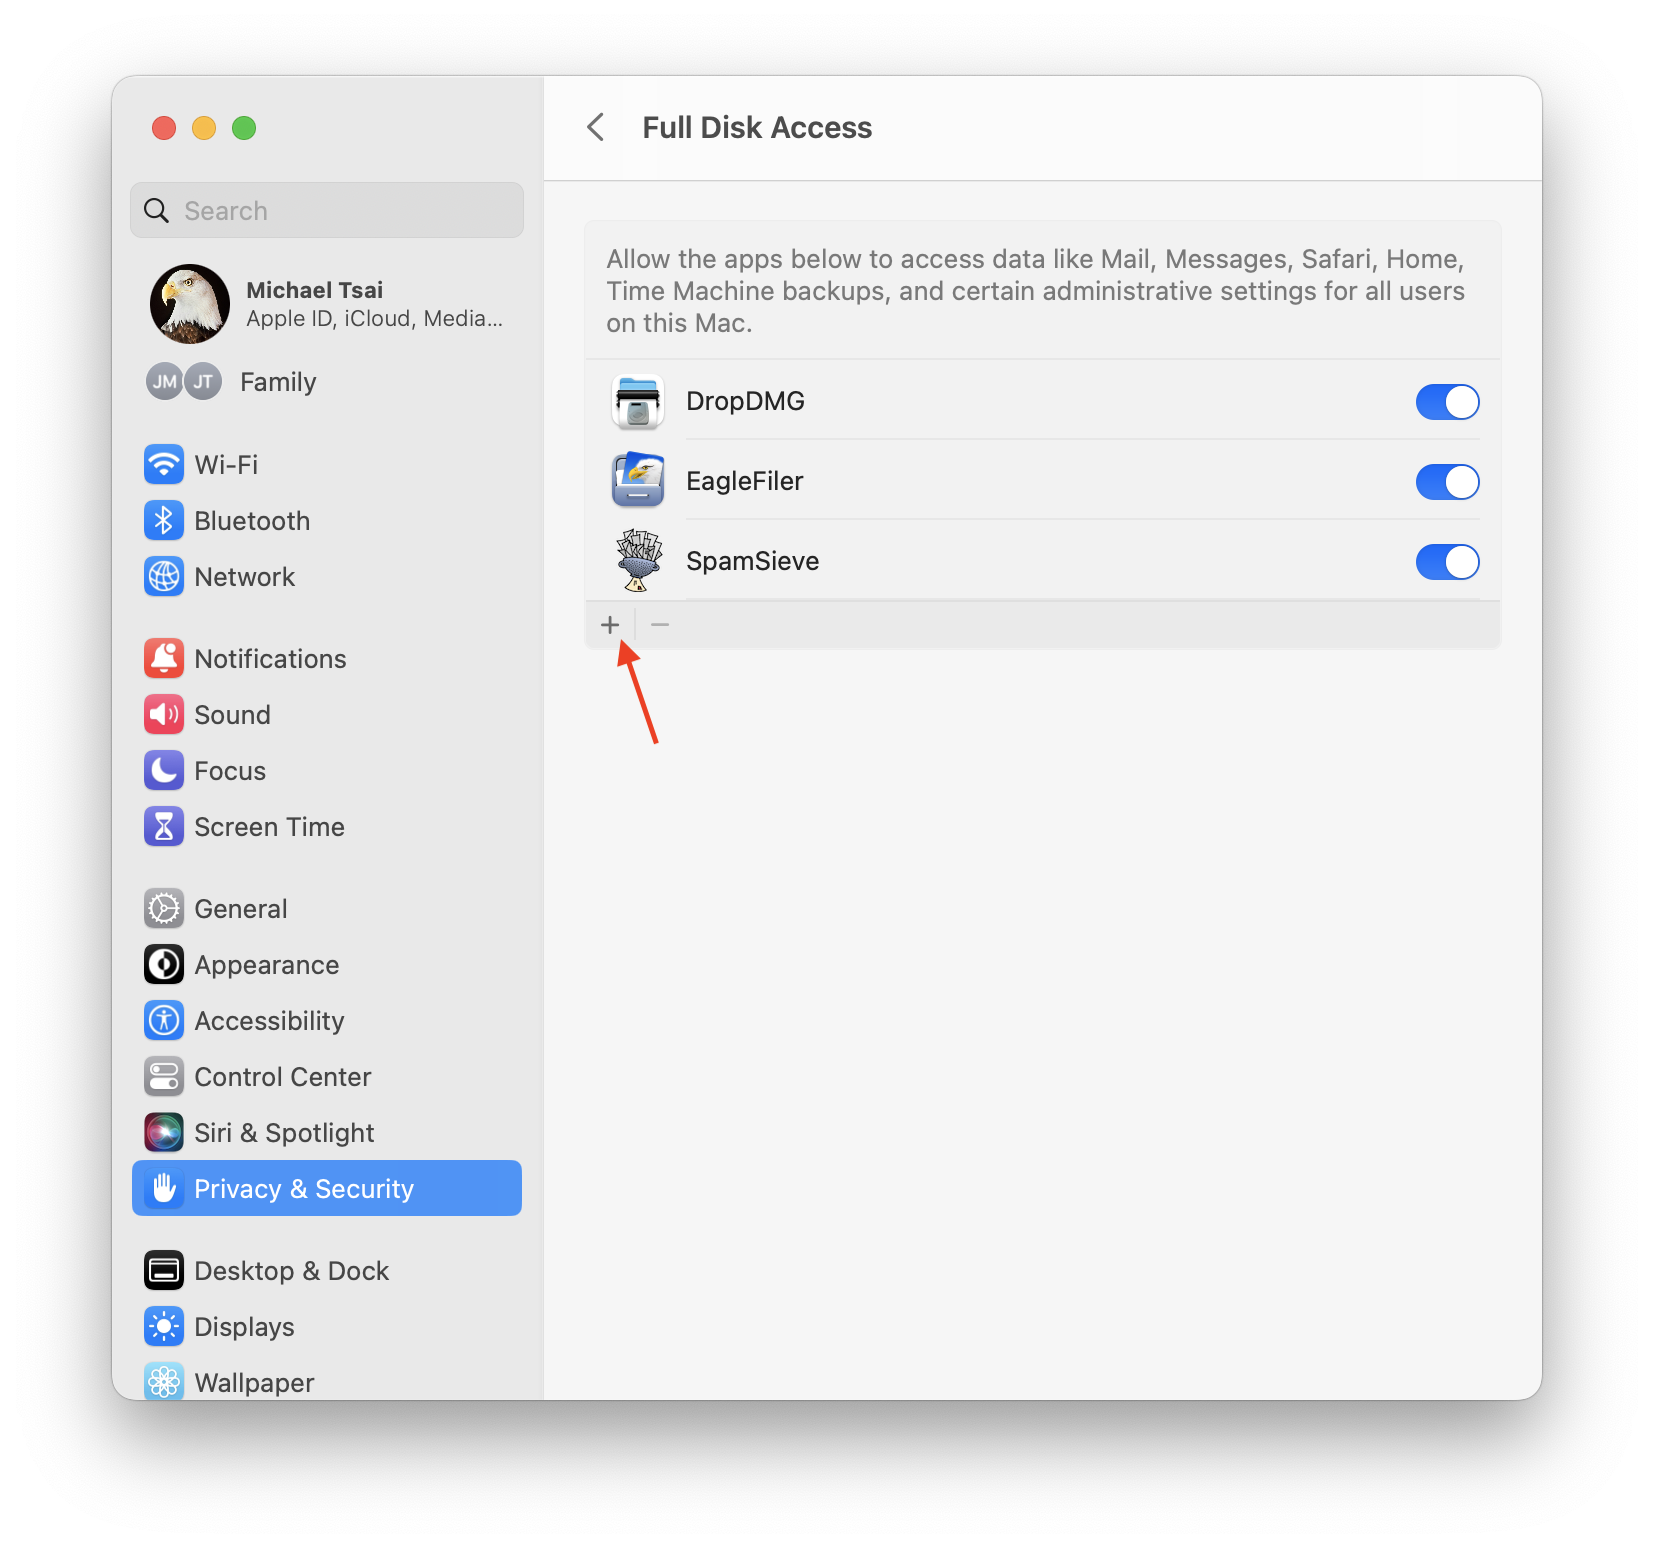
Scroll down if necessary to find EagleFiler in the list and click the switch to enable it. (If you don’t see EagleFiler in the list, click the + button and choose EagleFiler from your Applications folder.)
Click Quit & Reopen if applicable. EagleFiler should now appear in the list as checked.
Double-click the EagleFiler icon to relaunch it if it’s not already open.
To Grant Full Disk Access on macOS 12 and Earlier
Go to the Security & Privacy pane of System Preferences and click on the Privacy tab. Then scroll down and click on Full Disk Access. (You can also click here to go directly to Full Disk Access.)
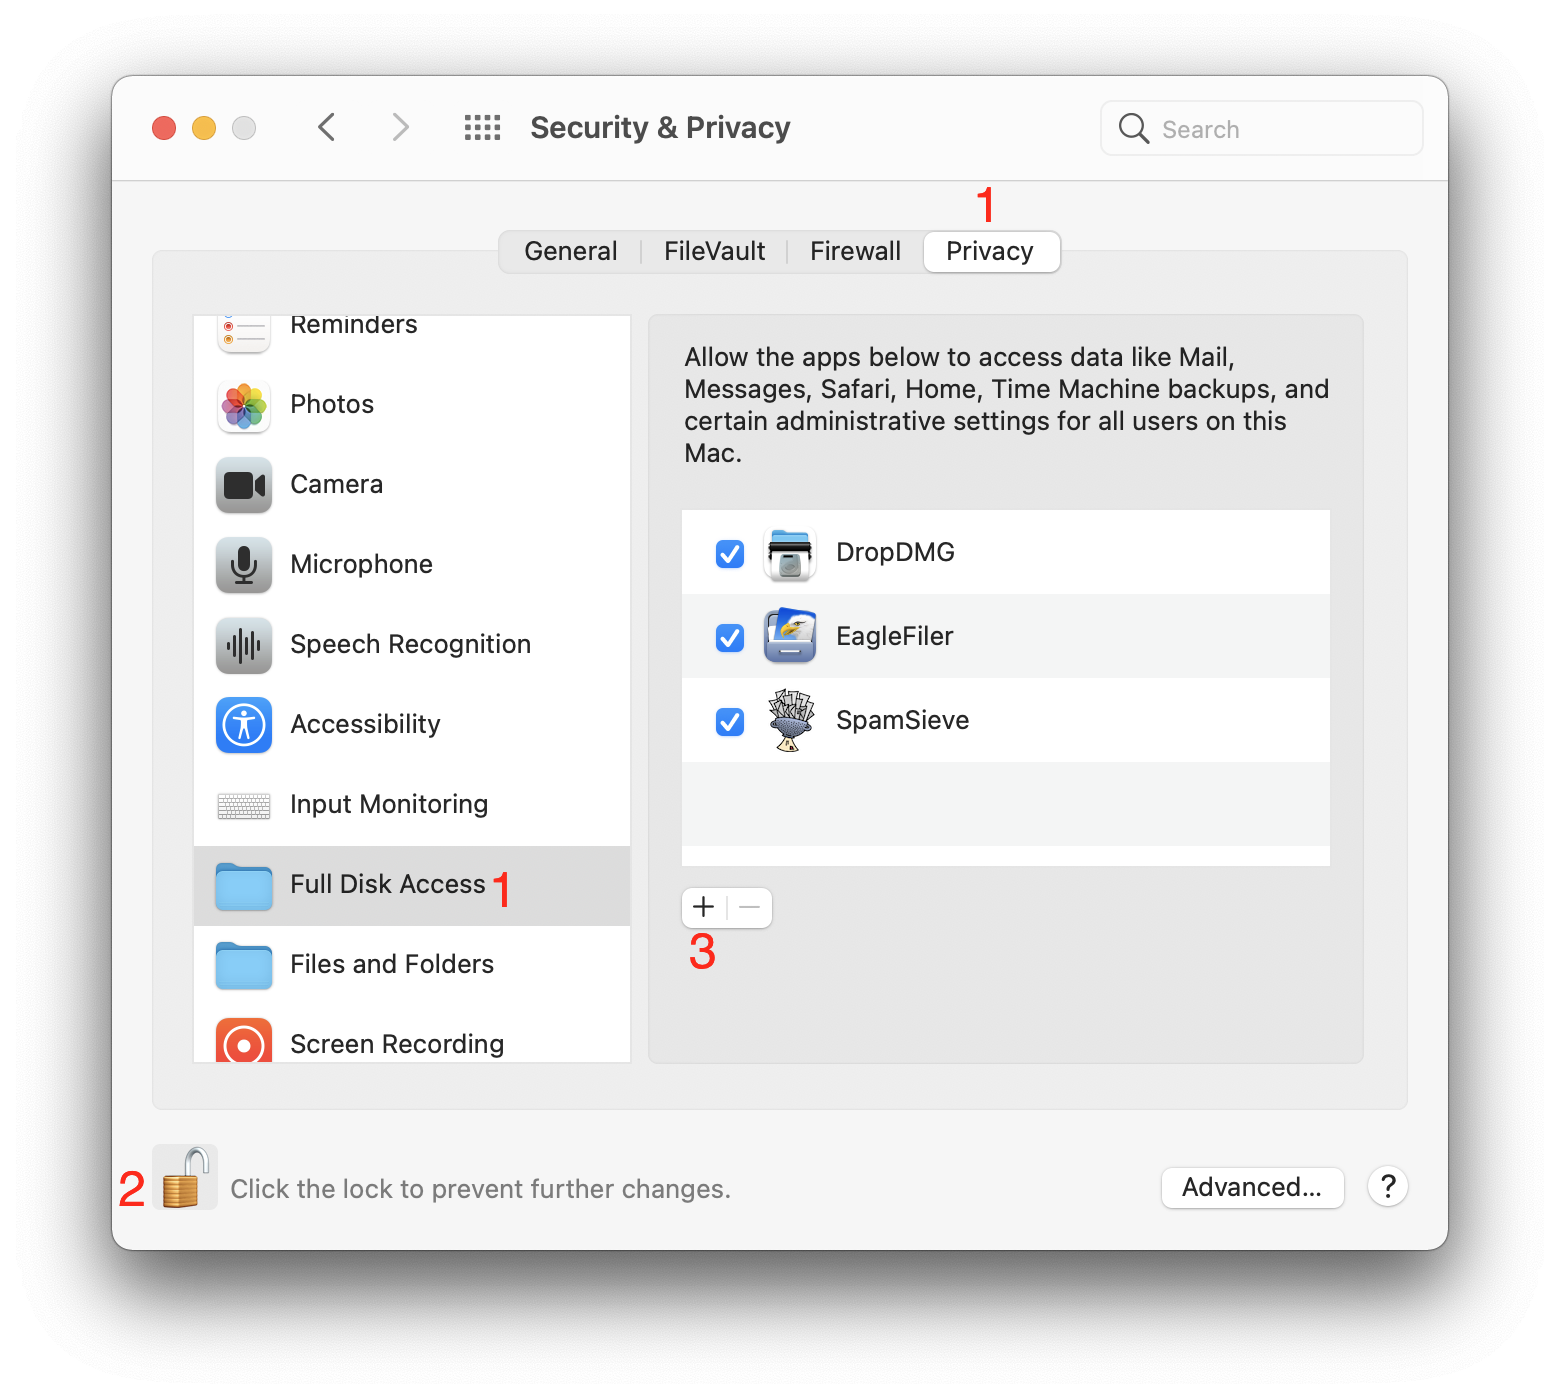
If the lock button in the lower left corner of the window is locked, click on it, enter your Mac’s login password, and click Unlock so that you are allowed to make changes.
Click the + button and choose EagleFiler from your Applications folder. Click Quit Now if applicable. EagleFiler should now appear in the list as checked.
Double-click the EagleFiler icon to relaunch it.
Troubleshooting Full Disk Access
In rare cases, EagleFiler may not appear in the Full Disk Access list after you add it. First, try restarting your Mac. You can also enter this command in Terminal:
tccutil reset SystemPolicyAllFiles
to reset the system’s database of Full Disk Access privileges and then try adding EagleFiler again.
If you still aren’t able to add EagleFiler, see the Troubleshooting Privacy Access section.