3.7 Setting Up Outlook
These instructions apply to Microsoft Office 365 (also known as Outlook 2016 and Outlook 2019, versions 15.x and 16.x). If you have lots of messages in your inbox (such that this setup slows down Outlook), you should instead follow the Setting Up Outlook (Large Inboxes) instructions. For older versions of Outlook, please see the Setting Up Outlook 2011 section.
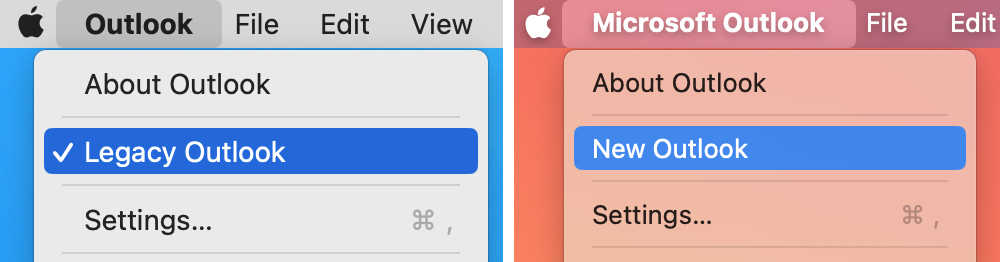
In Outlook, click on the Outlook menu at the top of the screen and make sure that Legacy Outlook is checked or that New Outlook is unchecked. There’s more information about this in the Turning Off New Outlook section of the manual.
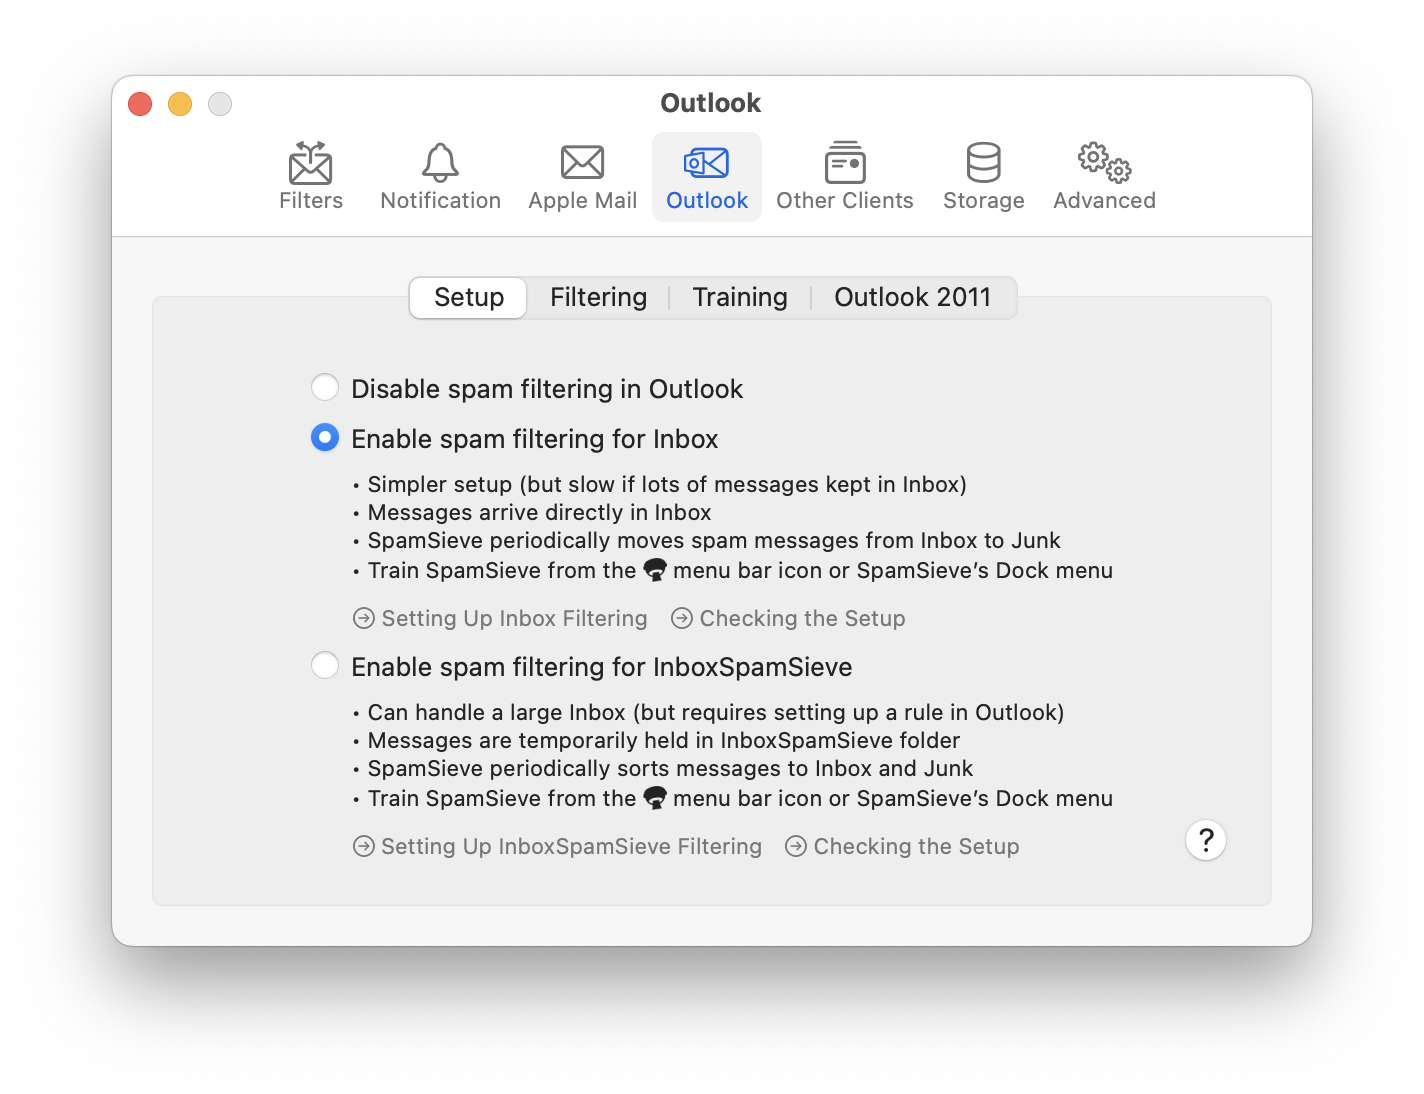
In SpamSieve, choose Settings… from the SpamSieve menu at the top-left of the screen and click on the Outlook and Setup tabs. Select Enable spam filtering for Inbox:
Click on the Filters tab of SpamSieve’s Settings. Make sure that Use Outlook/Entourage contacts is checked and click the Load Contacts button. You will want to do this again if you add more contacts to Outlook.
Now it is time to train SpamSieve. You can do this either from the SpamSieve menu bar icon at the top of the screen or from SpamSieve’s Dock menu:
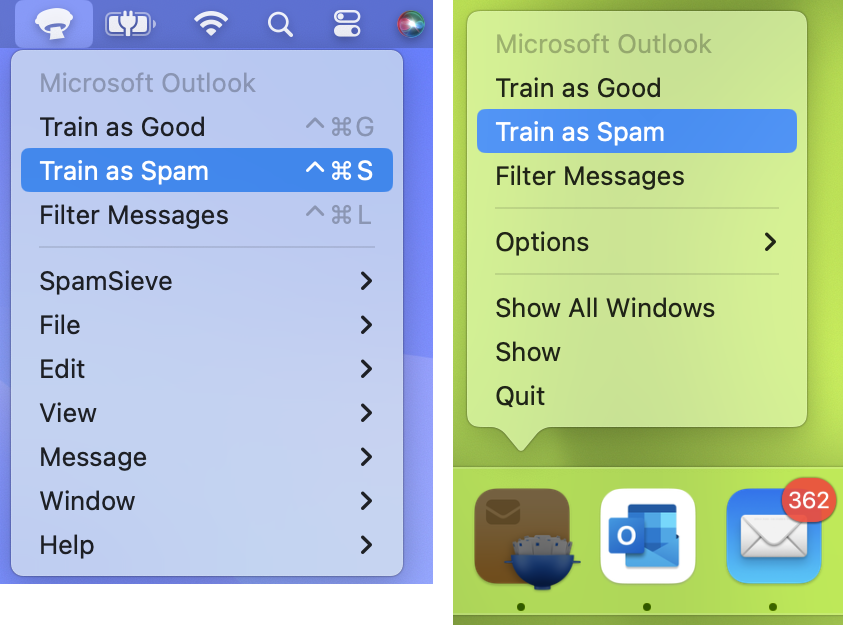
- To train SpamSieve with spam messages, select one or more of them in Outlook and then choose Train as Spam from the menu. The messages will be moved to the Junk Email folder. The keyboard shortcut for this command is Command-Control-S.
- To train SpamSieve with good messages, select one or more of them and then choose Train as Good from the menu. If a good message is in the Junk Email folder when you train it, it will be moved to the inbox.
The Do an Initial Training section explains which messages (and how many of them) you should train.
Note: On macOS 10.14 or later, the first time you try to train a message macOS will ask for permission to control Outlook, and you should click OK.
SpamSieve will process new mail automatically every minute, moving spam messages from Inbox to Junk Email.
If you ever need to manually ask SpamSieve to sift through a mix of spam and good messages, select the messages and choose Filter Messages from the SpamSieve menu bar icon or the SpamSieve Dock menu. SpamSieve will move the ones that it thinks are spam to the Junk Email folder.
The above is all you need to know about using SpamSieve with Outlook. The Outlook Customization section explains some more advanced setup options. If the filtering doesn’t seem to be working properly, you can check the setup as described in the Checking the Outlook Setup section.