3.1 Setting Up Apple Mail
This section describes how to set up SpamSieve and Apple Mail using the Mail extension on macOS 12 and later. If you have macOS 11 or earlier or want to use the more customizable Mail plug-in setup, see the Setting Up Apple Mail (Plug-In) section.
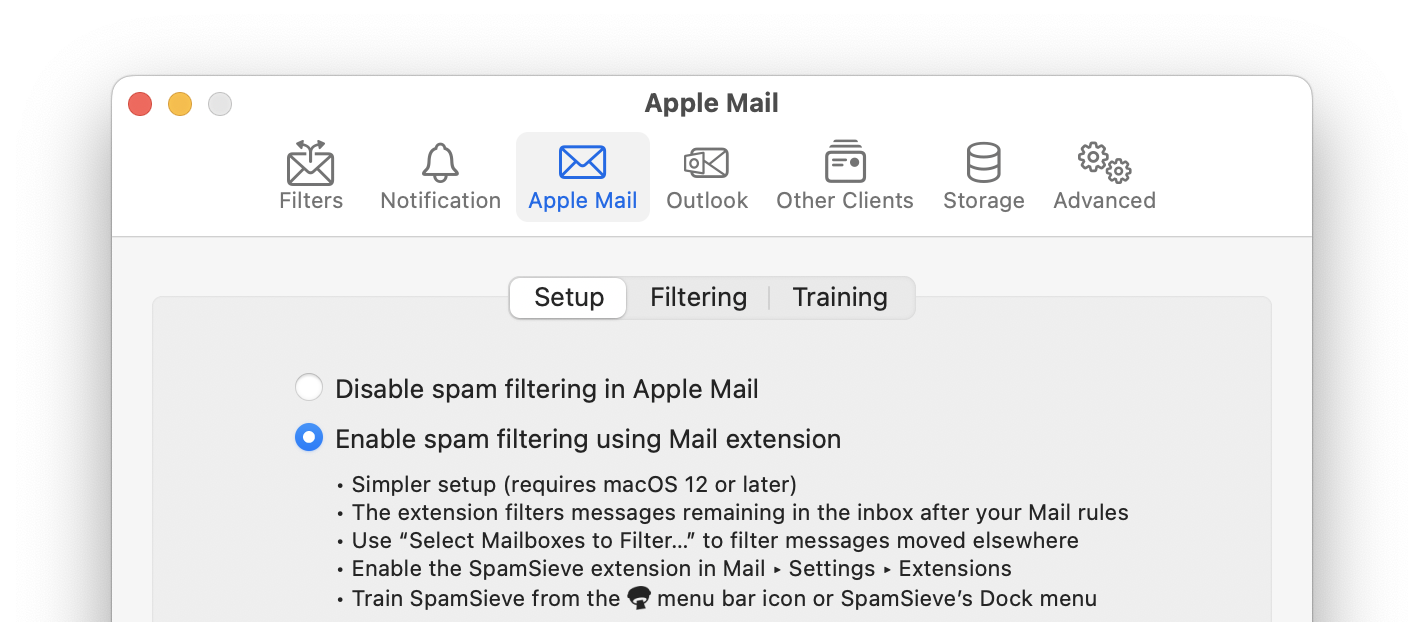
Choose Settings… from the SpamSieve menu at the top-left of the screen and click on the Apple Mail and Setup tabs. Select Enable spam filtering using Mail extension:
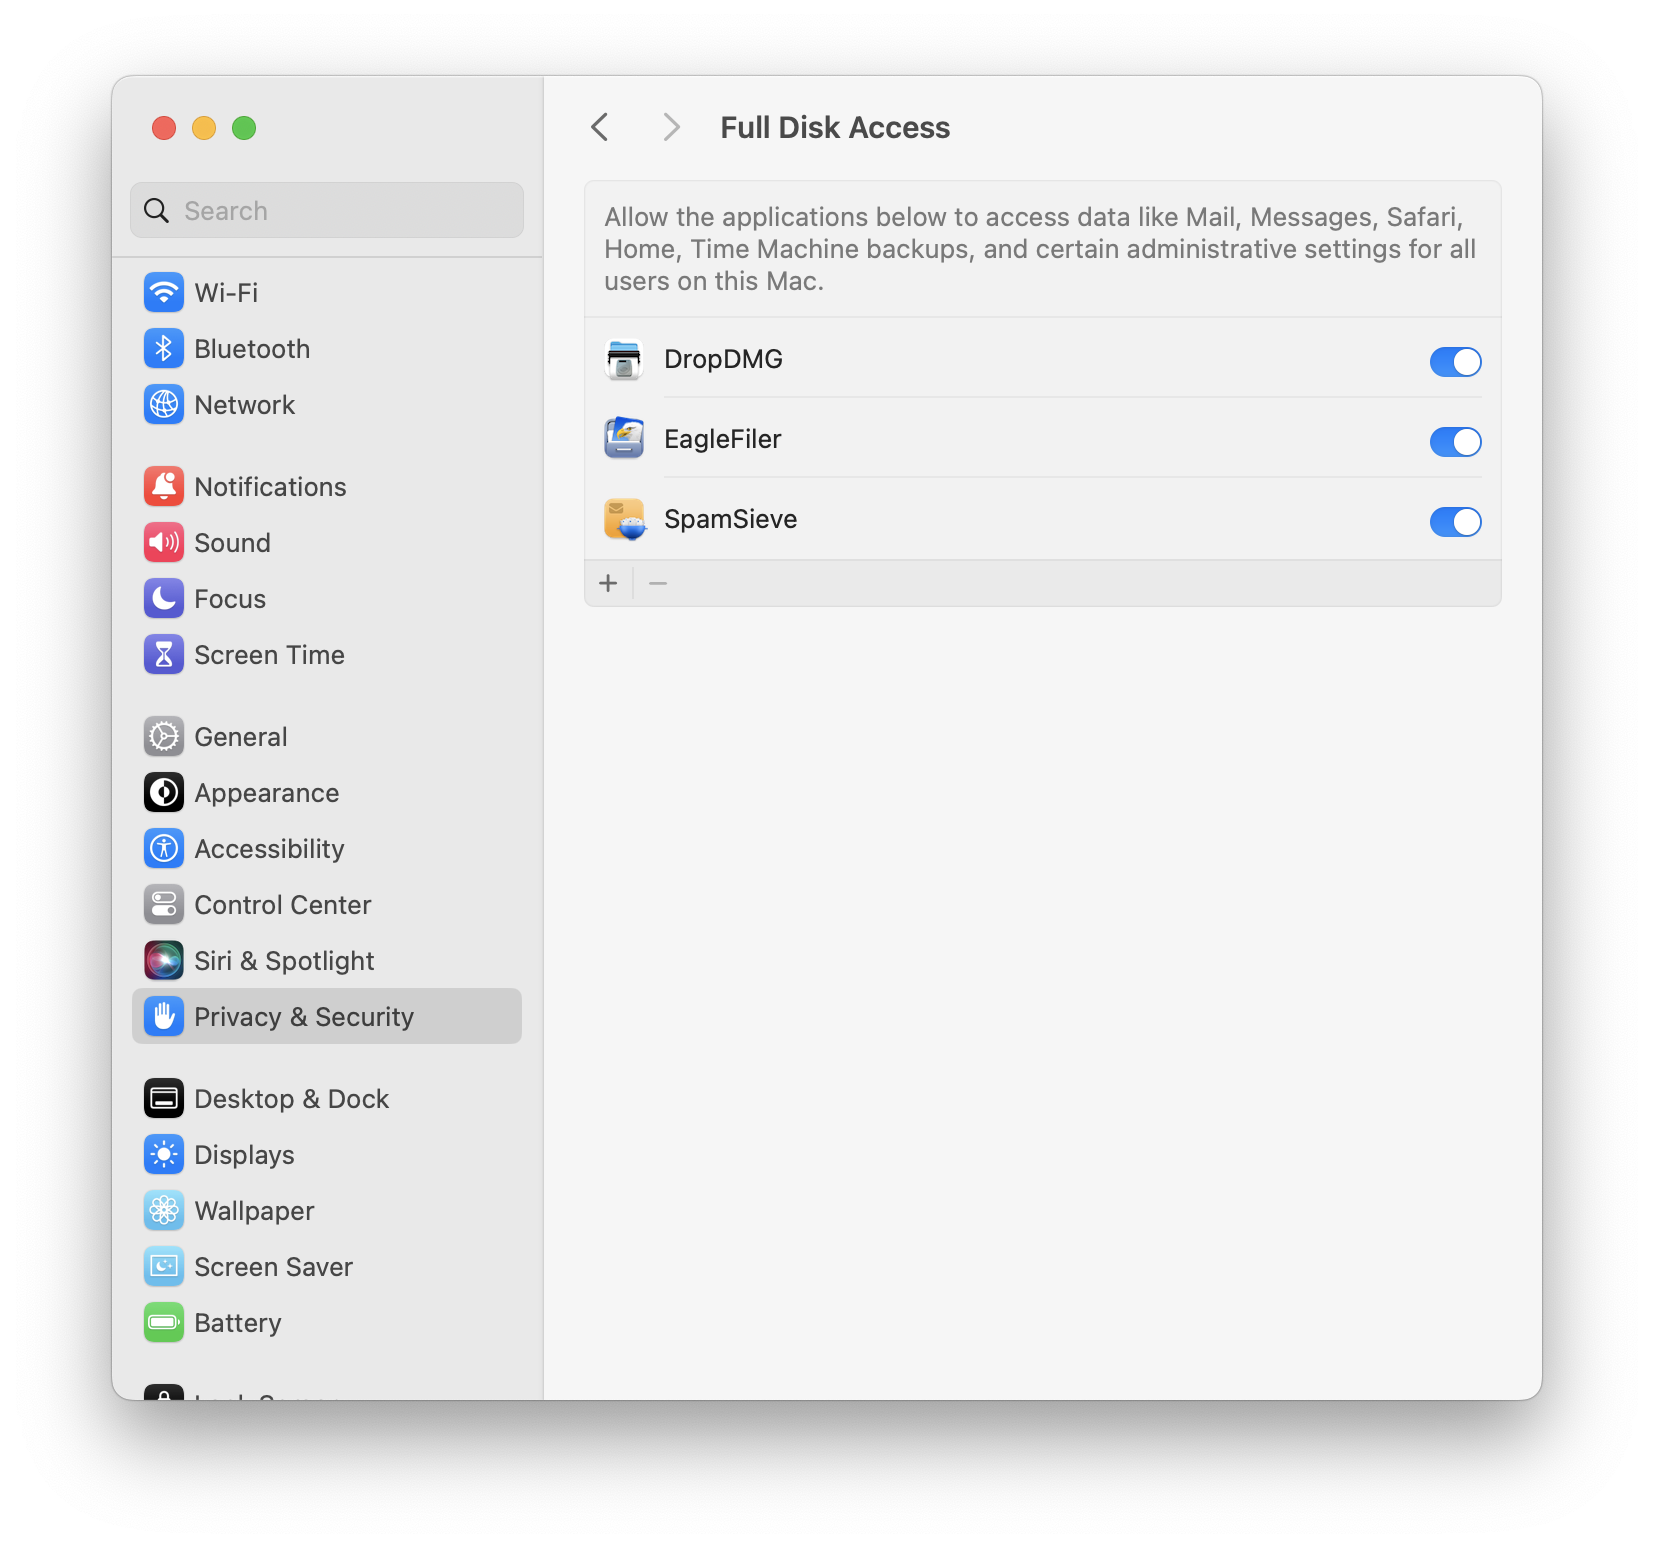
Make sure that SpamSieve has Full Disk Access by going to System Settings ‣ Security & Privacy. This is described in more detail in the Granting Full Disk Access section.
In Mail, open the Settings window and click on the Extensions tab. Check the box to enable SpamSieve:
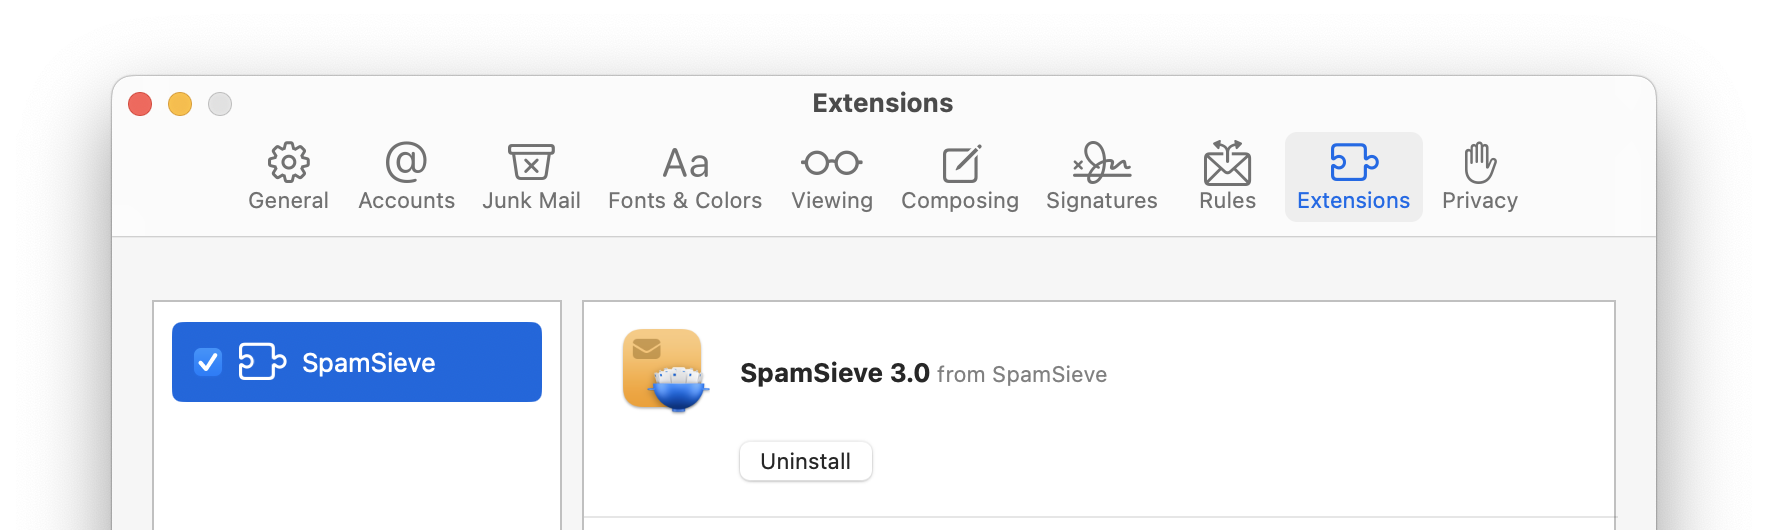
When prompted, click the Turn On button to confirm that you want to enable it. (SpamSieve should automatically appear in the Extensions list. If you don’t see it, make sure that SpamSieve is installed in your Applications folder. It may also help to quit and relaunch Mail or to restart your Mac.)
Click on the Rules tab of Mail’s Settings window.
- Make sure that there are no active rules whose names begin with SpamSieve, e.g. if you were using a previous version of SpamSieve. These rules should be deleted, unless you are still using the SpamSieve plug-in on another Mac that shares the same iCloud account; in that case, just uncheck them to make them inactive.
- If you had created rules to run SpamSieve AppleScripts, the names would not begin with SpamSieve, and you can keep them.
- If there are any other rules for processing spam/junk messages, we recommend that you disable them (by unchecking them) or delete them. Such rules are usually not needed when using SpamSieve and can cause confusion. If necessary, you can recreate them in SpamSieve’s Blocklist window.
- Other rules (not related to spam) can be left as-is.
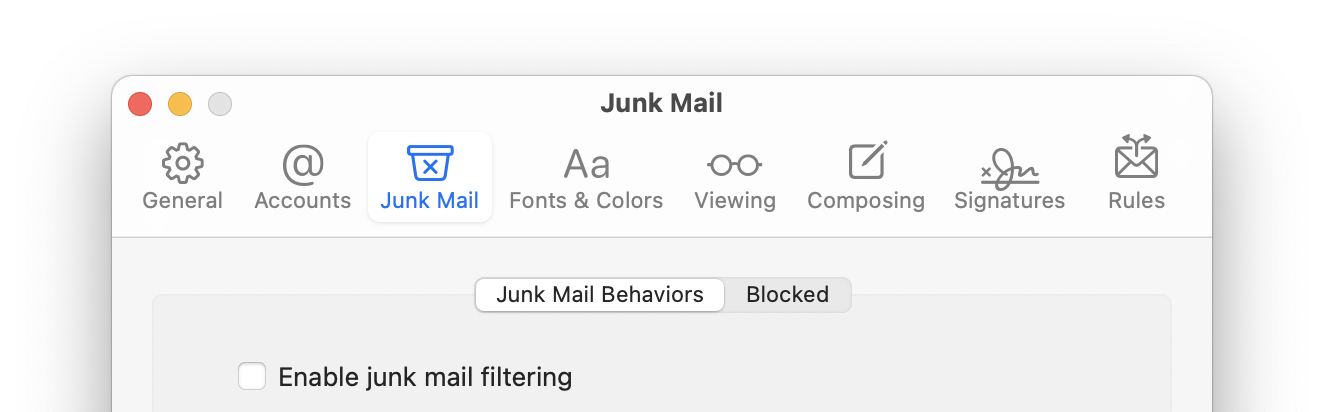
Click on the Junk Mail tab of Mail’s Settings window. On the Junk Mail Behaviors tab, uncheck Enable junk mail filtering. This will turn off Mail’s junk mail filter so that it doesn’t interfere with SpamSieve:
On the Blocked tab, uncheck Enable blocked mail filtering:
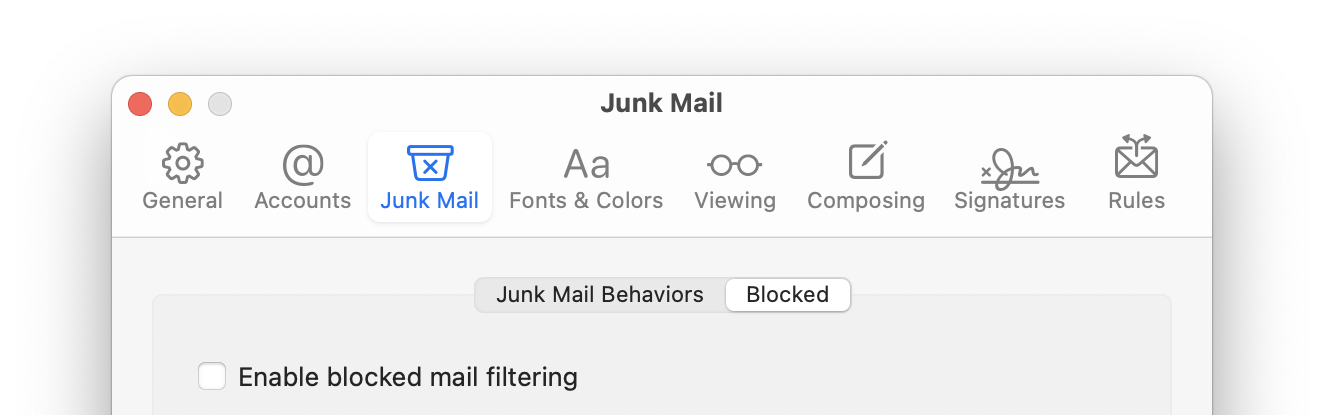
because this could move good messages to the trash even if SpamSieve thinks they’re good. It’s better to use SpamSieve’s own blocklist feature.
SpamSieve’s Mail extension filters new messages that end up in your inbox. Unlike the Mail plug-in (with SpamSieve on macOS versions before Sonoma) the Mail extension runs after the other Mail rules, so it does not have access to messages that were moved to a different mailbox by a Mail rule. Sometimes this is what you want, as you know that messages moved by a rule will never be spam. If you do want SpamSieve to remove the spam messages that were moved by Mail rules, go to the Settings ‣ Apple Mail ‣ Filtering tab and click Select Mailboxes to Filter… to choose which additional mailboxes you want SpamSieve to filter.
Now it’s time to train SpamSieve. You can do this either from the SpamSieve menu bar icon at the top of the screen or from SpamSieve’s Dock menu (when you click and hold on its Dock icon):
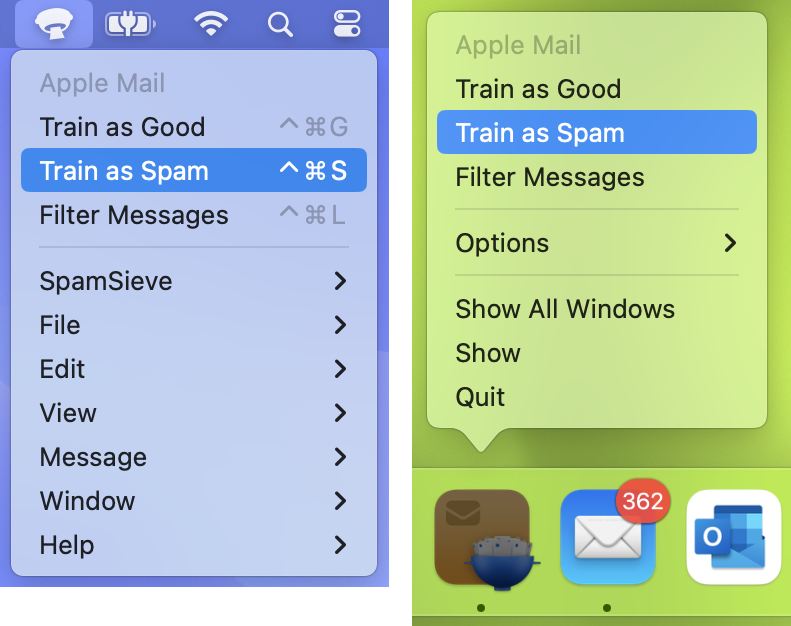
- To train SpamSieve with spam messages, select one or more of them in Mail and then choose Train as Spam from the menu. The messages will be colored in gray and moved to the Junk mailbox. The keyboard shortcut for this command is Command-Control-S. (Do not use the Move to Junk command in Mail.)
- To train SpamSieve with good messages, select one or more of them and then choose Train as Good from the menu. If a good message is in the Junk mailbox when you train it, it should move to the inbox—otherwise, see this section. (Even with Mail’s built-in junk mail filter disabled, Mail may show a Not Junk button at the top of spam messages; you should ignore this, i.e. always choose Train as Good rather than clicking the Not Junk button.)
The first time you try to train a message, macOS will ask for permission to control Mail, and you should click OK. When training multiple batches of messages, you should wait for Mail and SpamSieve to finish processing one batch before training the next.
The Do an Initial Training section explains which messages (and how many of them) you should train.
SpamSieve will process new mail automatically and move the spam messages to the Junk mailbox. In most cases, new messages in the inbox will be filtered immediately. In rare cases, the Check inboxes for new messages not sent to Mail extension feature will filter them after a slight delay. The Filter spam messages in other mailboxes feature also operates on a slight delay.
Spam messages caught by SpamSieve will have brown text and a colored background in the message list. You may also see messages with brown text on a white background (when your Mac is in Light Mode). These were likely caught by a server-side junk filter before they got to your Mac. These messages were not processed by SpamSieve, so they are not mistakes and should not be trained as spam.
If you ever need to manually ask SpamSieve to sift through a mix of spam and good messages, select the messages and choose Filter Messages from the SpamSieve menu bar icon or the SpamSieve Dock menu. SpamSieve will move the ones that it thinks are spam to the Junk mailbox.
The above is all you need to know about using SpamSieve with Mail. The Apple Mail Customization section explains some more advanced setup options, such as configuring the “new mail” notification sound.
If you need to troubleshoot SpamSieve and Apple Mail, see the Checking the Apple Mail Setup section and the Apple Mail–Specific Questions section.