3.2 Setting Up Apple Mail (Plug-In)
This section describes how to set up SpamSieve and Apple Mail using the Mail plug-in on macOS 10.13 through macOS 13. If you have macOS 14 or want to use the simpler Mail extension setup, see the Setting Up Apple Mail section.
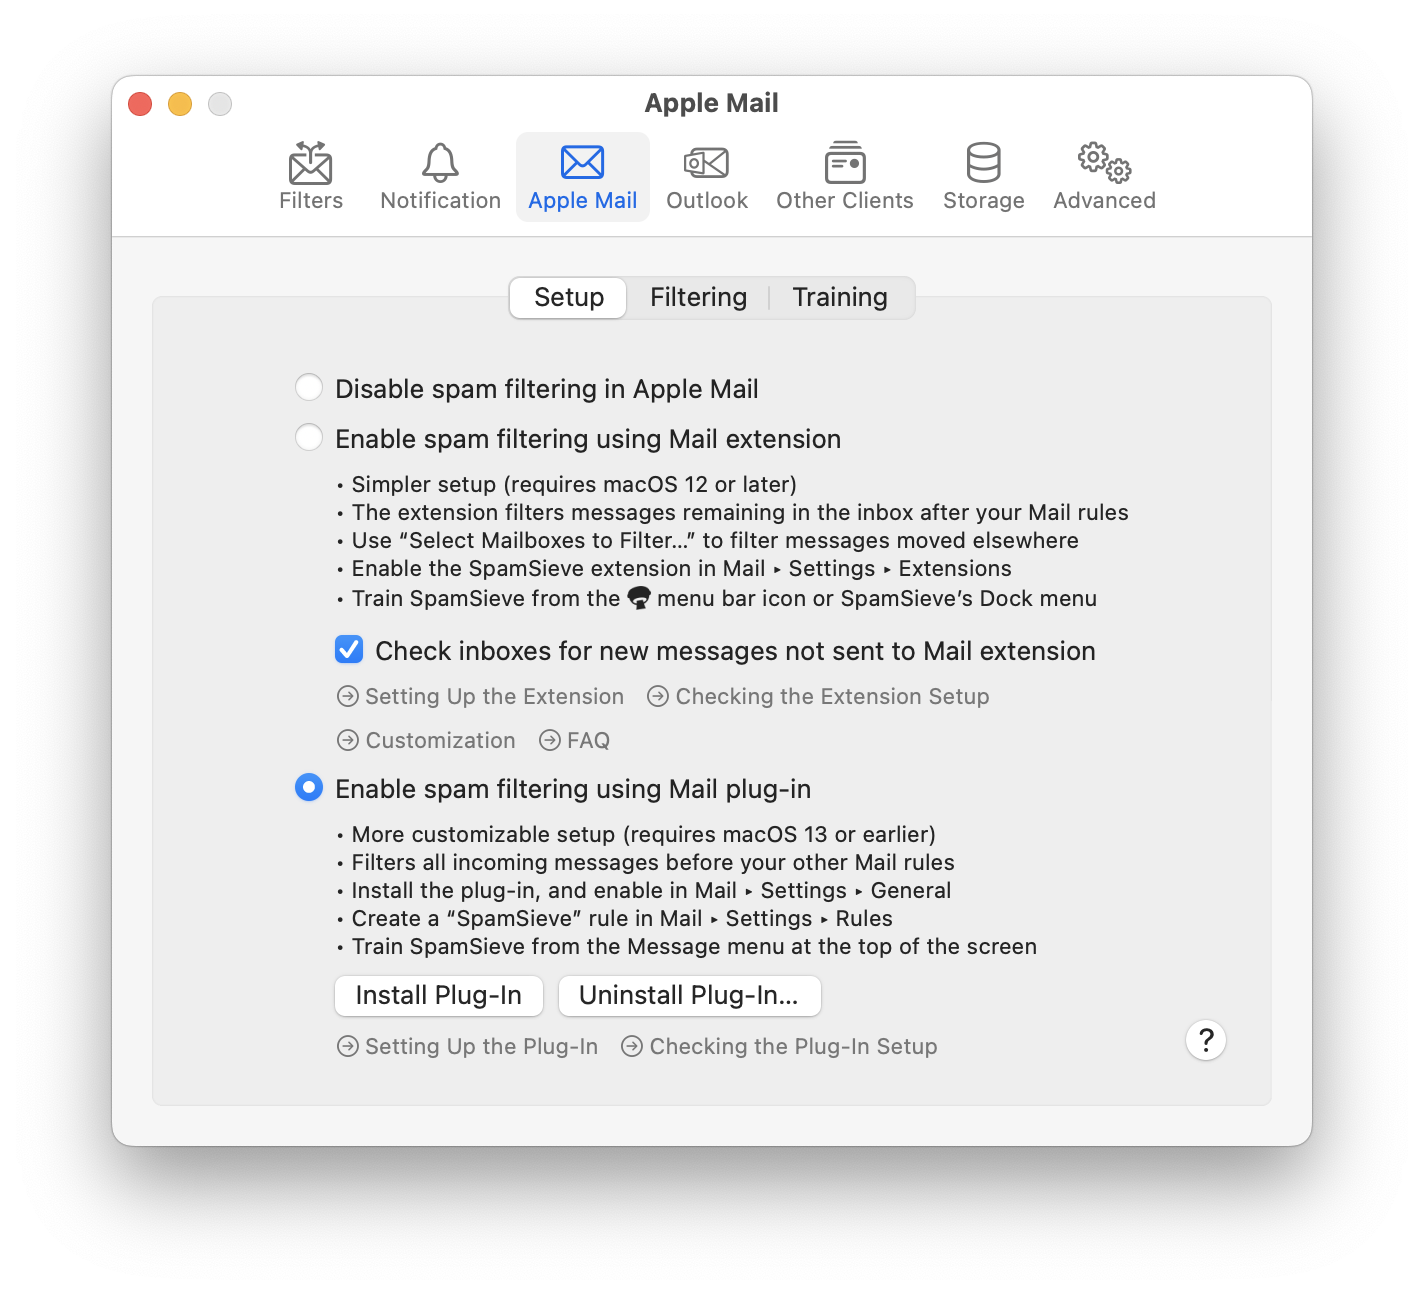
Choose Settings… from the SpamSieve menu at the top-left of the screen (in earlier versions of macOS this is called Preferences…) and click on the Apple Mail and Setup tabs. Select Enable spam filtering using Mail plug-in:
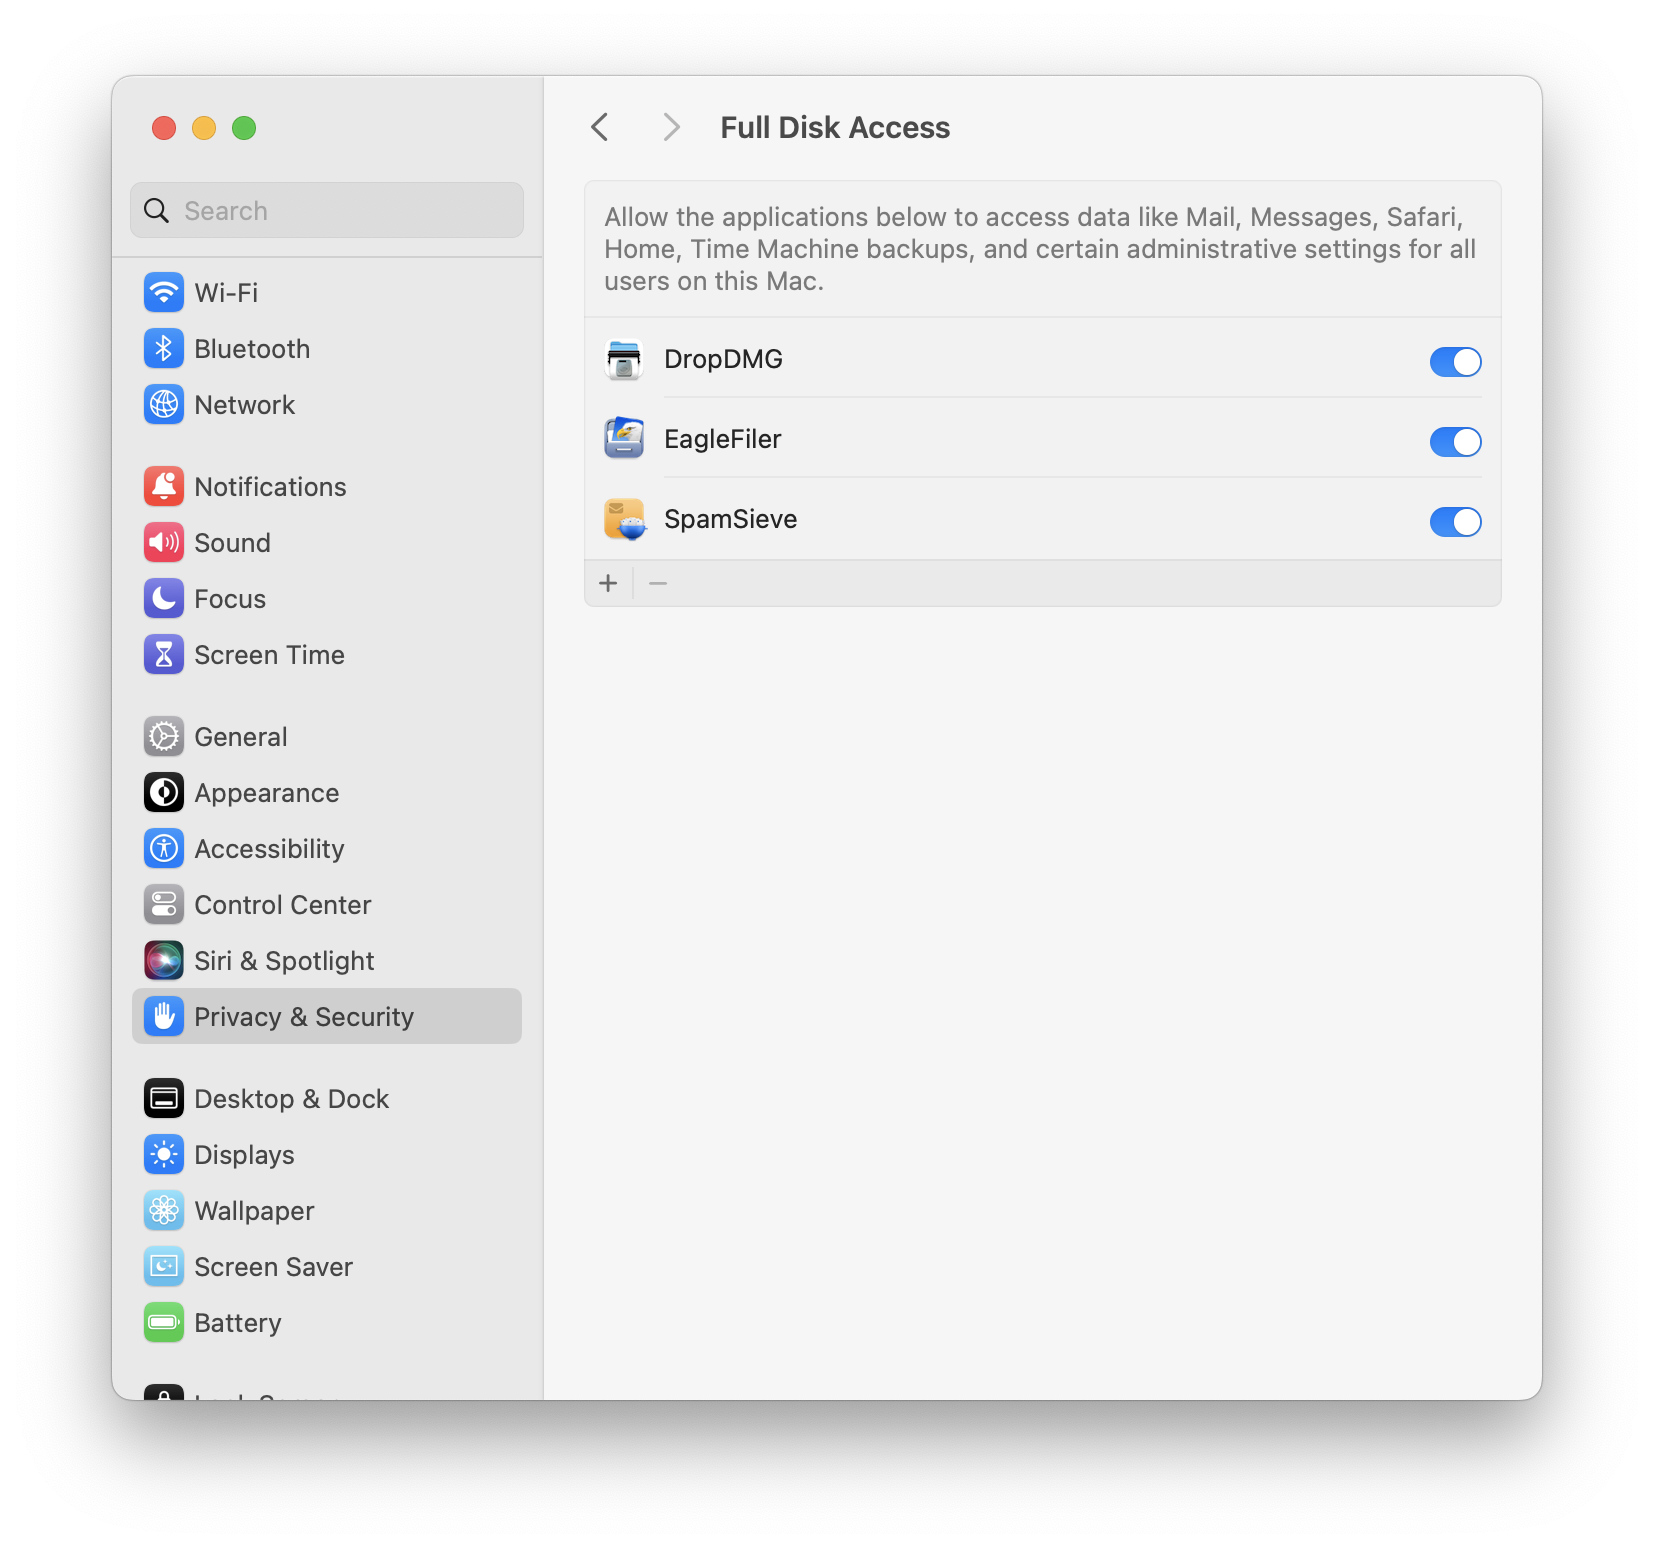
Make sure that SpamSieve has Full Disk Access by going to System Settings ‣ Security & Privacy. This is described in more detail in the Granting Full Disk Access section. (If you are using macOS 10.13 or earlier, you can skip this step.)
Quit Mail. Then double-click the SpamSieve application, go to Settings ‣ Apple Mail ‣ Setup, and click the Install Plug-In button. Now relaunch Mail.
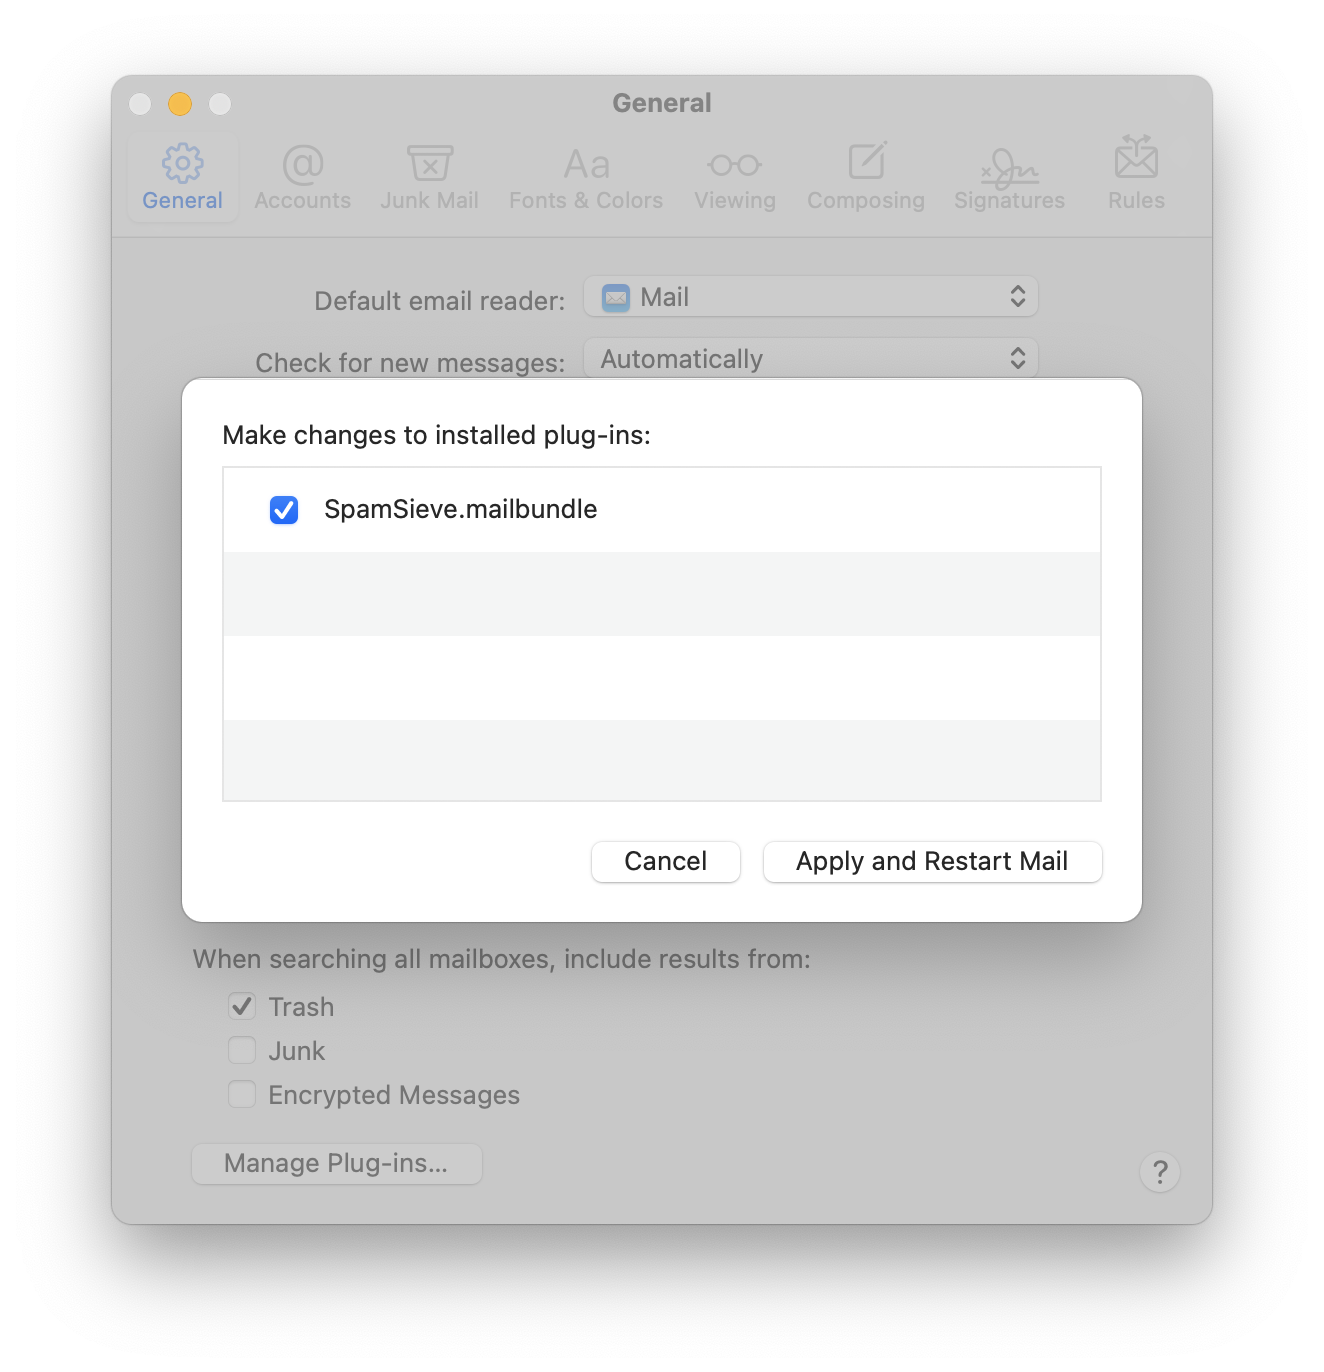
Click Manage Plug-ins… in Mail’s General settings and enable SpamSieve.mailbundle. This is described in more detail in the Enabling and Updating the Apple Mail Plug-In section. (If you are using macOS 10.13 or earlier, you don’t have to enable the plug-in.)
You should now see the SpamSieve - Train as Good and SpamSieve - Train as Spam items in Mail’s Message menu:
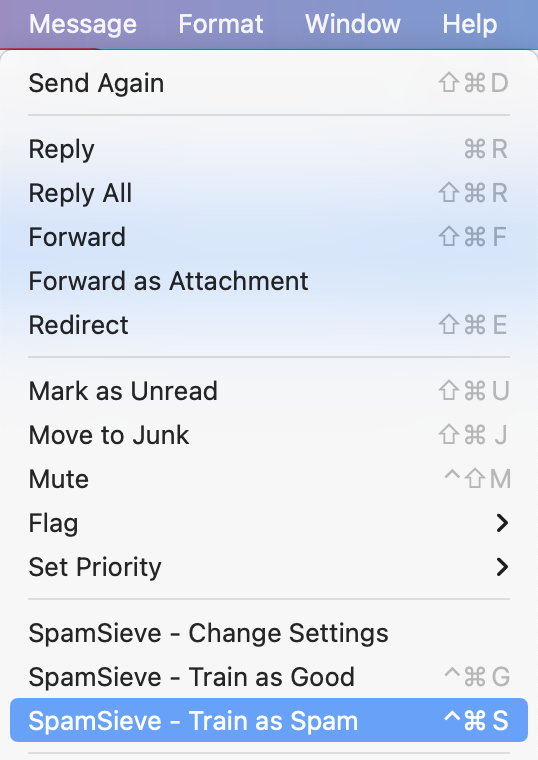
If you do not see these commands, please see the Why don’t I see the SpamSieve commands in Apple Mail’s Message menu? section.
Now you will set up a rule in Mail to move the incoming spam messages to the Junk mailbox:
Choose Settings… from the Mail menu and click the Rules button in the toolbar.
Click the Add Rule button.
Change the description to SpamSieve.
Note: The description of the rule must start with SpamSieve, but you can add additional text after that, if you want, so long as you don’t use square brackets, which SpamSieve uses for color rules.
Change the From pop-op menu to say Every Message, which is near the bottom of the menu.
Next to Move Message, select the top-level Junk mailbox with the special junk bin icon:

On macOS 11 and later, if you have multiple mail accounts, this will be called All Junk. This should always appear in the pop-up menu for selecting a mailbox. To show it in Mail’s sidebar, you can add it to the favorites.
On earlier versions of macOS or if you have a single mail account, it will be called Junk.
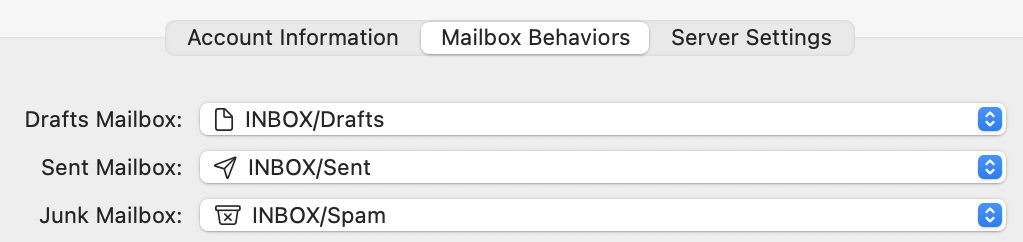
In rare cases, there may not already be a Junk mailbox. You can create one with the Mailbox ‣ New Mailbox… command. Make sure to create it within your account (rather than under On My Mac, unless you only have POP accounts) and then select it in your account’s Mailbox Behaviors.
Previous versions of SpamSieve had you select a Spam mailbox here. You can still do that, but we recommend switching to the Junk mailbox.
The rule should now look like (except that it may say Junk instead of All Junk, depending on your macOS version):
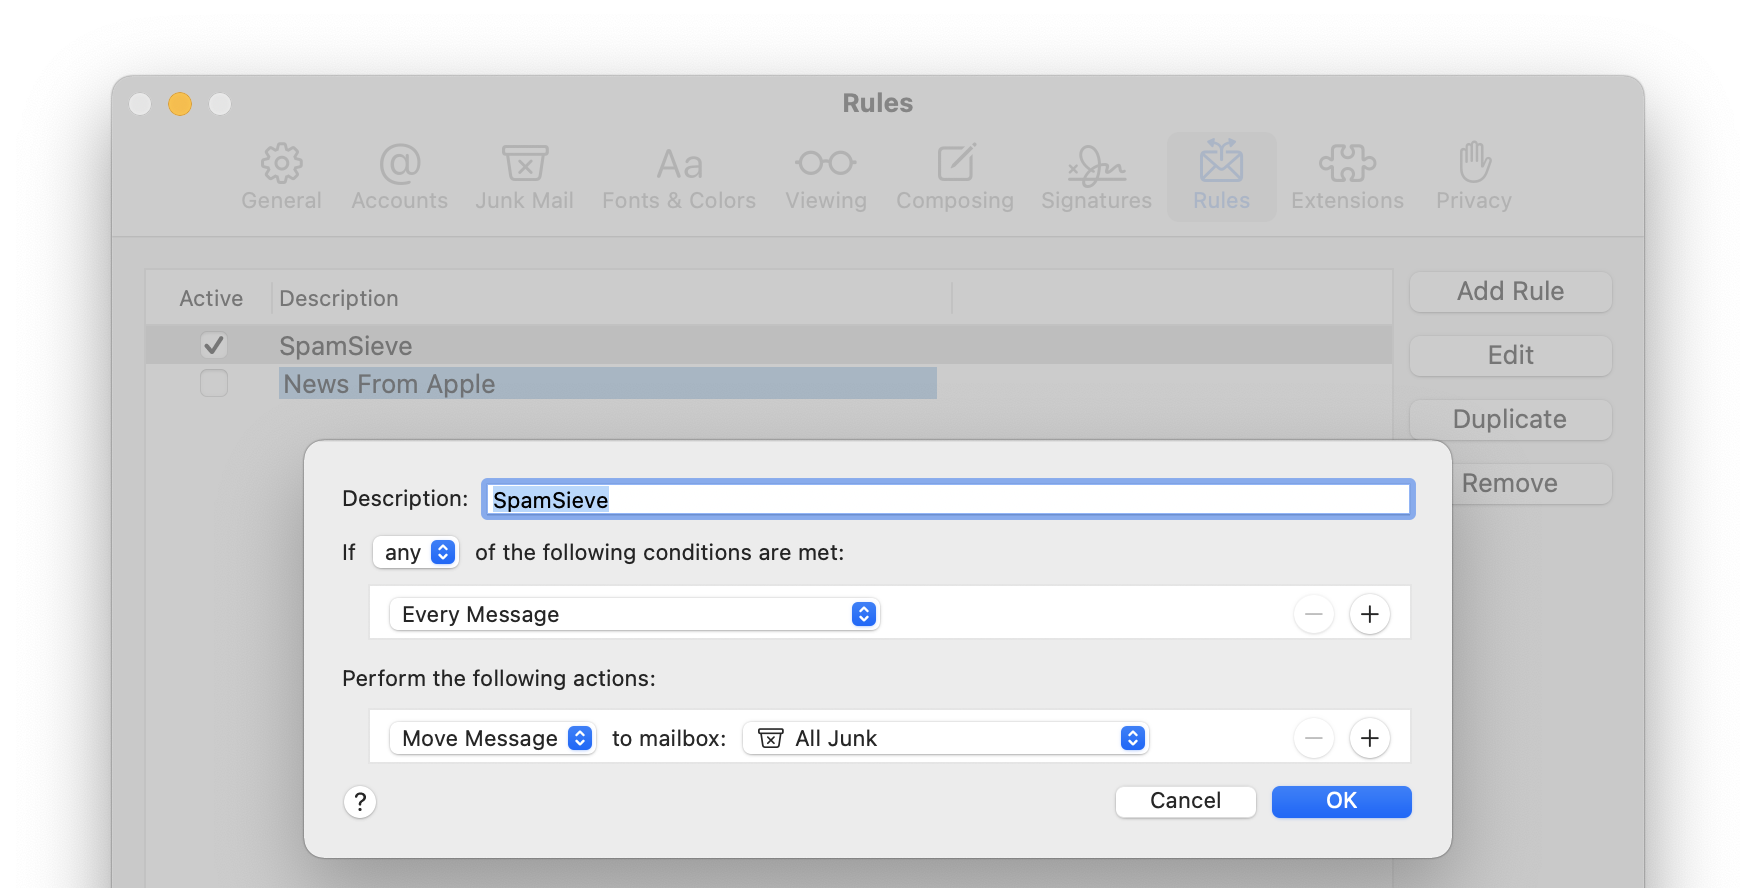
Note: Although the rule looks like it will move every message to the All Junk or Junk mailbox, because you have installed SpamSieve’s plug-in, it will only move the spam messages.
Now click OK to close the rule and save your changes. Mail may ask if you want to apply the rule; click Don’t Apply. (If you were to click Apply now, or in the future when editing a rule, that would filter all of the currently displayed old messages through SpamSieve, and you would be obliged to correct any mistakes.)
Drag the SpamSieve rule to the top of the list so that SpamSieve will be able to filter all of your mail. It’s fine to have additional rules in Mail for processing your good messages. Just make sure that they are below the SpamSieve rule. If you ever need to temporarily disable SpamSieve, e.g. for testing purposes, you can do so simply by unchecking the rule.
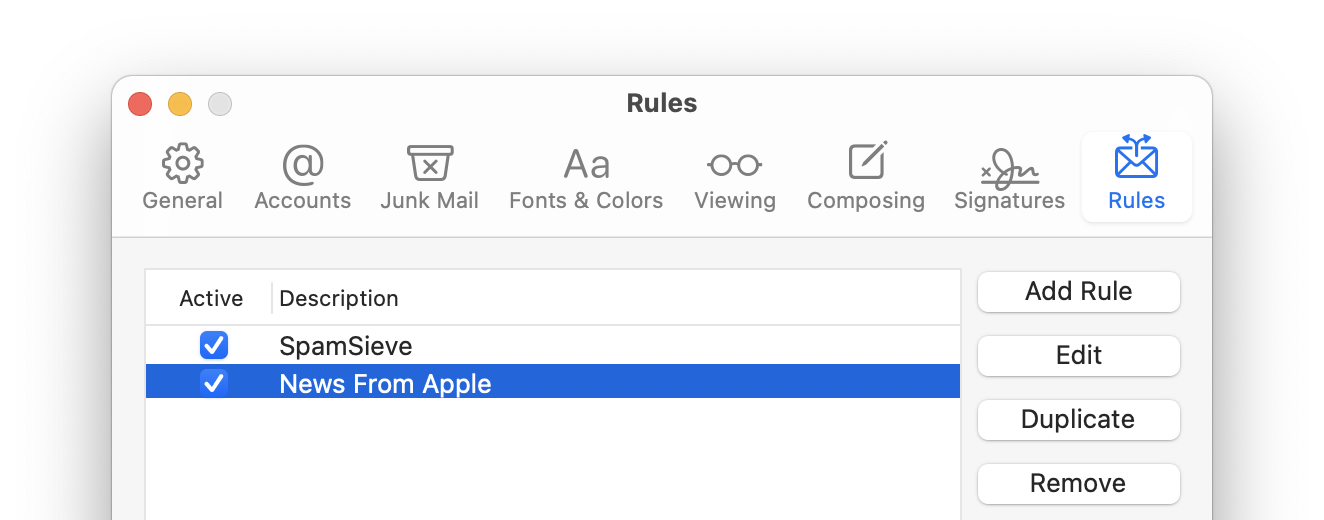
Make sure that the list shows no other rules for processing spam/junk messages. If you find any, disable them (by unchecking them) or delete them.
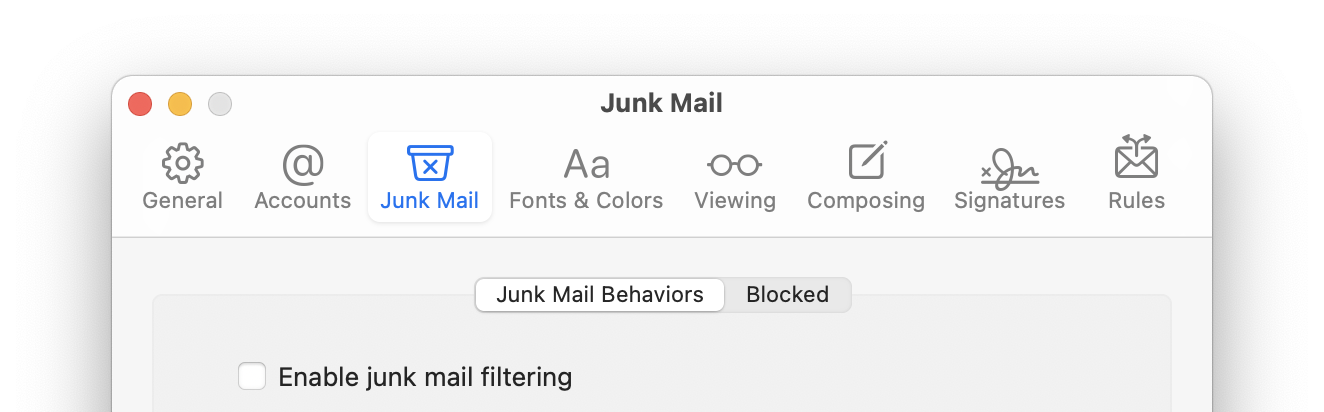
Go to the Junk Mail tab of Apple Mail’s Settings window. If there is a Trust junk mail headers in messages option, uncheck it. Uncheck Enable junk mail filtering on the Junk Mail Behaviors tab. This will disable its junk mail filter so that it doesn’t interfere with SpamSieve.
You may also want to uncheck Enable blocked mail filtering on the Blocked tab. This is because it can be hard to know when to train a SpamSieve mistake if Mail has already deleted the message. SpamSieve’s own blocklist automatically works with messages you’ve trained as spam, and you can set such messages to go directly to the trash if you want. To block unwanted messages that are not spam, we recommend creating a rule in Mail above the SpamSieve rule.
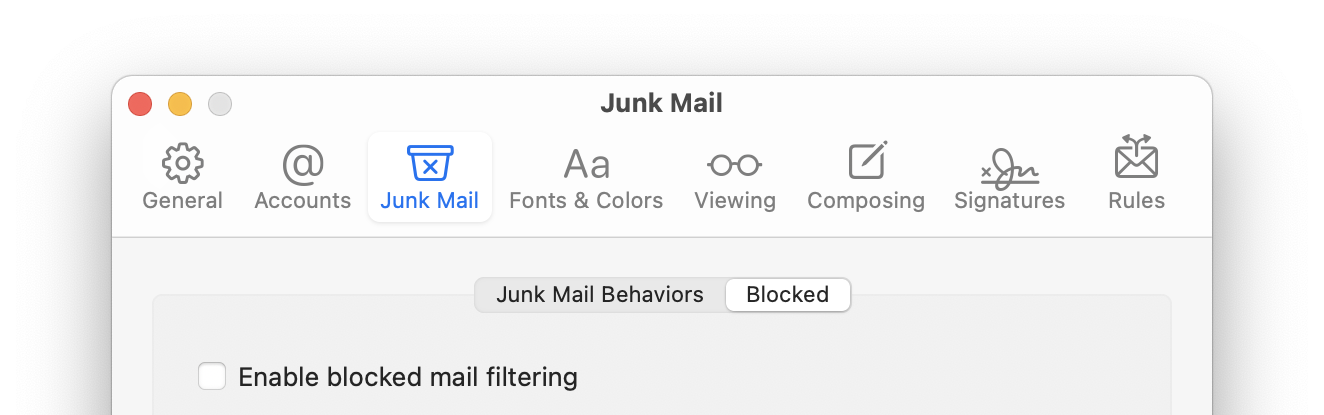
Note: Prior to macOS 10.15, there is no separate Junk Mail Behaviors tab—Enable junk mail filtering is on the Junk Mail tab—and there is no Enable blocked mail filtering option.
Now it is time to train SpamSieve:
To train SpamSieve with spam messages, select one or more of them in Mail and then choose SpamSieve - Train as Spam from the Message menu. The messages will be colored in gray and moved to the Junk mailbox. The keyboard shortcut for this command is Command-Control-S.
To train SpamSieve with good messages, select one or more of them and then choose SpamSieve - Train as Good from the Message menu. If a good message is in the Junk mailbox when you train it, it should move to the inbox—otherwise, see this section.
Even with Mail’s built-in junk mail filter disabled, Mail may show a Not Junk button at the top of spam messages; you should ignore this, i.e. always choose SpamSieve - Train as Good rather than clicking the Not Junk button.
The first time you try to train a message macOS will ask for permission to control Mail and SpamSieve, and you should click OK. When training multiple batches of messages, you should wait for Mail and SpamSieve to finish processing one batch before training the next.
The Do an Initial Training section explains which messages (and how many of them) you should train.
SpamSieve will process new mail automatically and move the spam messages to the Junk mailbox.
Mail may still color some messages brown and show them in the Junk mailbox, even though its own junk filter is off; this is normal. The Junk mailbox holds spam messages caught by server-side junk filters before they got to your Mac. These messages are not processed by SpamSieve, so they are not mistakes and should not be trained as spam. It’s also normal for messages in the Junk mailbox to say that you marked them as junk; this is because SpamSieve told Mail that they were junk on your behalf.
If you ever need to manually ask SpamSieve to sift through a mix of spam and good messages, select the messages and choose Apply Rules from the Message menu. SpamSieve will move the ones that it thinks are spam to the Junk mailbox.
The above is all you need to know about using SpamSieve with Mail. The Apple Mail Customization section explains some more advanced setup options, such as configuring the “new mail” notification sound.
If you need to troubleshoot SpamSieve and Apple Mail, see the Checking the Apple Mail Setup (Plug-In) section and the Apple Mail–Specific Questions section.