4.2.7 Mount Image…
The most straightforward way to mount a disk image is to double-click it. This works on any macOS installation, even if DropDMG isn’t installed.
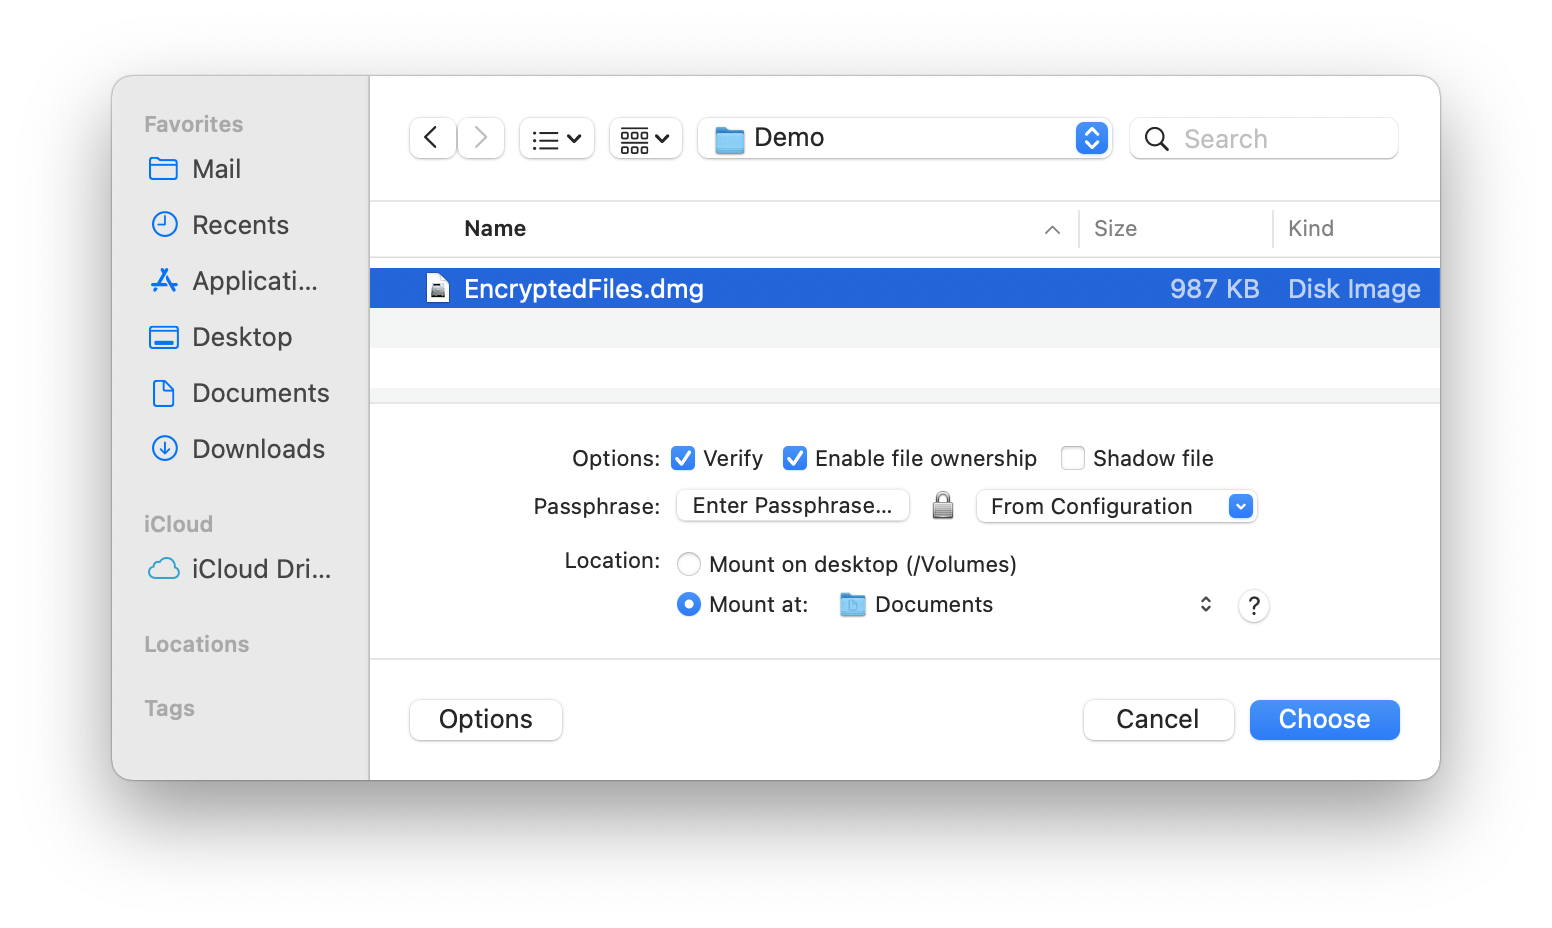
DropDMG also provides the Mount Image… command in the File menu, for additional options and convenience.
- Verify
- Verification ensures that the contents of the disk image are intact, i.e. the file is not damaged. Only read-only disk images can be verified. You can turn off verification to reduce the time it takes to mount the disk image. Also, if you know that a disk image is damaged, you can turn off verification (which you know will fail, anyway) to access the disk image and try to recover the files in it. For more information on verification, see the Verify Image… section.
- Enable file ownership
- When you mount an image by double-clicking it, macOS treats every file on the mounted image as though it were owned by you (the current user). When you mount an image using this option, the files are displayed with their actual owners, as stored on the disk image. Thus, if you use DropDMG to back up a collection of files whose ownership matters, you should also use DropDMG to mount the image when you restore from that backup.
- Shadow file
- This option lets you mount a read-only disk image as read-write. Any changes that you make are written to a .shadow file so that the original disk image file remains unchanged. One use for this feature is if you need to use Spotlight to search a read-only disk image. Spotlight requires write access (even if its index is already up-to-date), but it will work if you mount the disk image using a shadow file. To make a new disk image file that incorporates the changes from the shadow file, drag the mounted disk image onto DropDMG.
- Passphrase
When you double-click an encrypted disk image, macOS prompts you for the passphrase. DropDMG lets you avoid this step, which is particularly handy when bulk-mounting images with the same passphrase or when mounting segmented disk images. The Enter Passphrase… button lets you specify the passphrase for mounting the disk image. The From Configuration pop-down menu lets you use a passphrase that’s stored in your keychain as part of a configuration.
- Location
- Normally, disk images are mounted on the desktop. You can also specify some other location in your local filesystem. This is useful when another application looks for files in a particular folder. For example, say that you want to encrypt your mail. You could create a New Blank Disk Image… and then mount it at /Users/<username>/Library/Mail/, and then Apple Mail will stores its files on that disk image.
One advantage of using DropDMG’s Mount Image… command, rather than double-clicking a disk image in the Finder, is that DropDMG only makes you enter the passphrase for an encrypted, segmented disk image once. The Finder requires that you type the passphrase once for each segment or that you store the passphrase in the keychain, which you might not want to do.
Additionally, DropDMG’s Mount Image… command will skip the display of any software license agreements.
You can hold down the Command or Shift key to mount multiple disk images at once using the same options.